
Hi there!
Long time no update, I know, I’m sorry, and here’s why.
If you follow me on instagram (@haan.chen), I’m sure you’ve seen tons of feedback from people who already got their hands on binstax. Check out my story highlights overthere, you won’t be disappointed!
Here’s one feedback I got from Mathias recently:
Let me say that I am absolutely amazed by the build quality, the binstax has nothing even remotely diy about it. It oozes quality. It operates as one would expect perfectly. The image quality you can achieve with it is what you’d expect from the RB67 and leaps and bounds beyond anything seen on regular instax cameras.
Any criticism I’d have would be about the actual film material (hard to expose correctly, the b/w variant not being particularly “black” ever, rather “dark grey/white”) and the format- Polaroid 600 is almost twice the image area which makes quite a difference. But that says nothing about the amazing binstax which is absolutely great.
Mathias


I don’t know where I should start, so many things have happened in the past few months. To be honest, I’m feeling kind of burned out and I don’t know what to do. I constantly get emails from people asking when I’m going to ship the next batch of binstax, or zinstax, to the point that I don’t even want to check the emails anymore. On the one hand, I feel bad keeping you guys wait. On the other hand, I’m exhausted repeating myself over and over again answering the same questions.
I’m not an outgoing person and I really enjoy solitude, spending time alone doing my little things in my own world, like sitting in front of my computer with with a cup of coffee, tweaking the CAD model of binstax with a caliper in my hand. Calipers are amazing, by the way, if I can only have one measurement tool for the rest of my life, I’ll get a caliper any day of the week. I measured all dimensions need for zinstax and binstax with a single caliper.
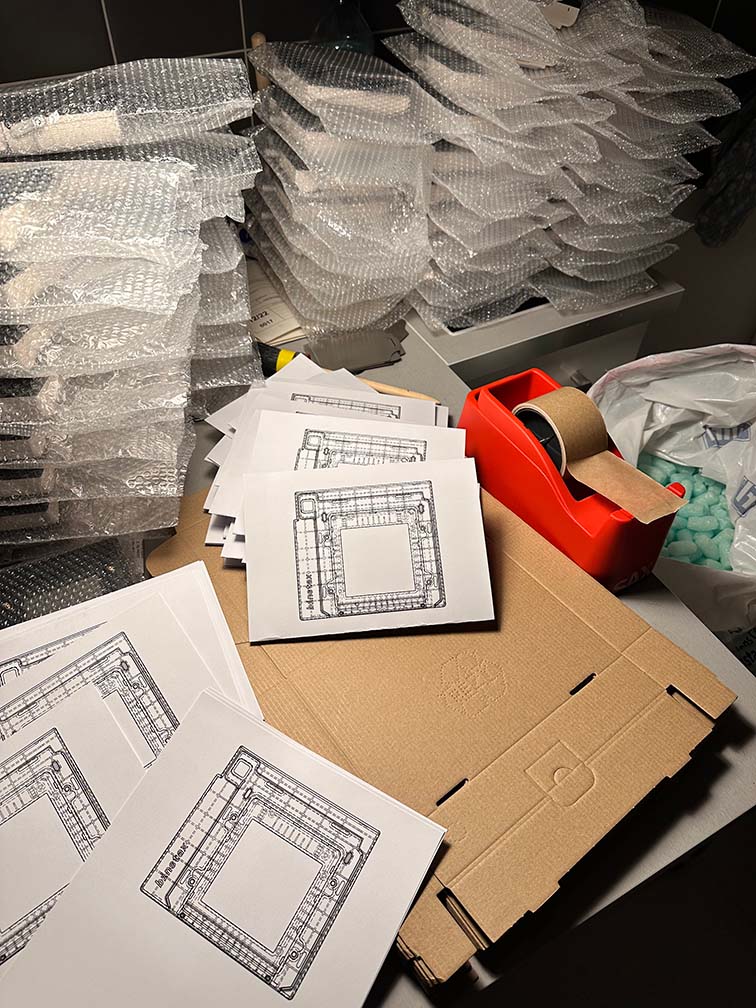
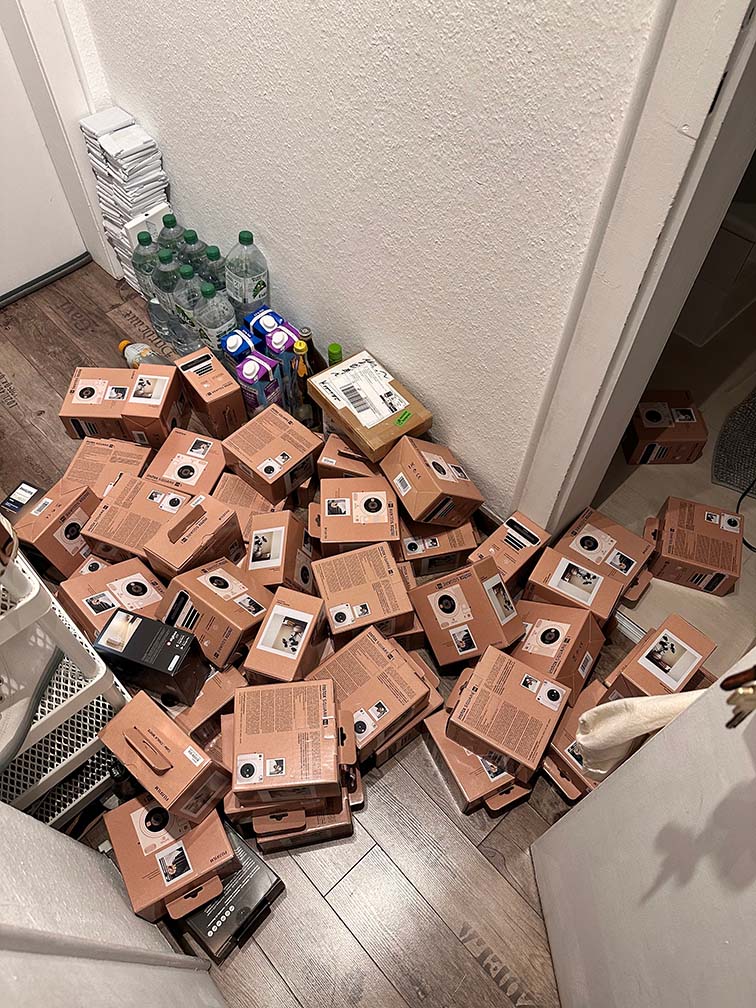
Making these backs might still be fun when you’re just starting out, but after making hundreds of them, it’s just repetitive work with a lot of labour involved. A step could be super finicky, like assembling the one-way mechanism for the crank. I savage the tiny springs in the SQ1 lens because I can’t seem to find them on sale anywhere (good job Fuji). Unfortunately these nano-sized springs have a whole loop on both ends. I’ll have to cut out a portion of the loop to make it a hook before I can use them. Imaging doing this twice for each springs hundreds of times. And what’s worse, the wire I cut off either shoots off into the 4th dimension, or sticks to my cutter and I can’t for god’s sake demagnetize the cutter even if I tried. Have I already mentioned these springs are microscopic?
My desk is a mess while making a batch. My apartment is like a bit smaller than 20 m2 (that’s 215 square foot for you my pal *insert joke about imperial measurements*) so I only have one desk. That’s why I sometimes reply to your email after 3 days, it’s because I’ll have to take all the crap off my desk to make room for the keyboard. And that’s also the reason why I haven’t updated the site in what felt like a billion years.
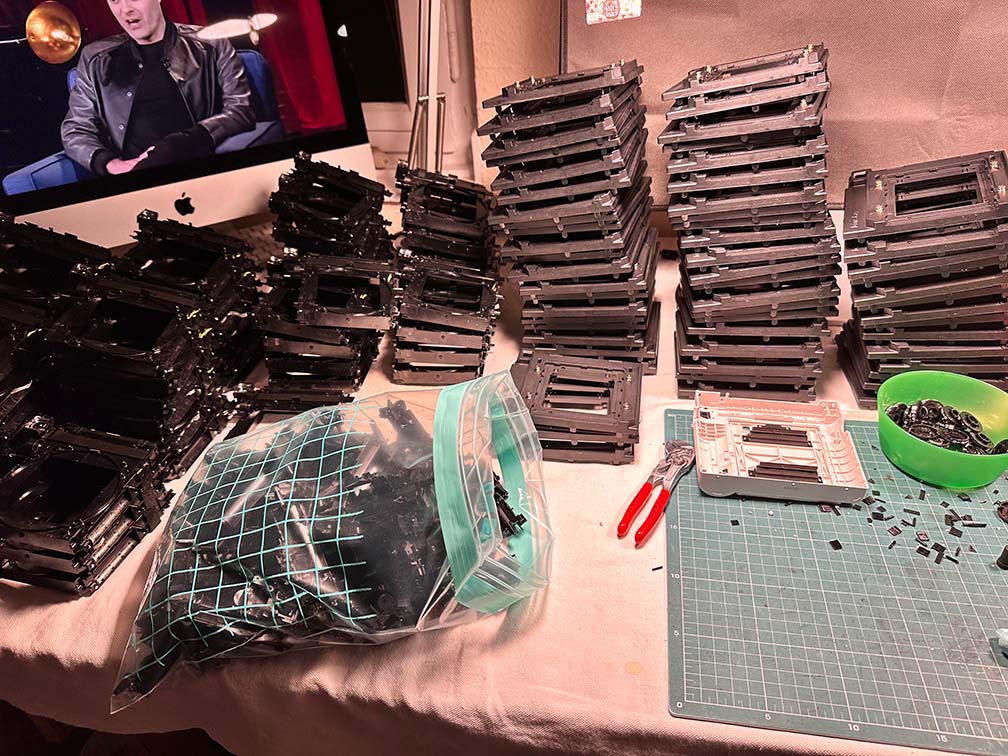
And don’t get me started on ordering 100 pieces SQ1 on Amazon and got them delivered in gazillion packages. It really takes a lot of time to unbox them, really.

Hopefully I didn’t come off as too grumpy, haha. Just want to let you know why I’m slow in replying to your emails recently. It’s because I’m either 1. asleep, 2. making binstax/zinstax, or 3. busy with my master thesis.
I’ve probably mentioned somewhere already that I’m also doing my master thesis on injection molding right now. I have an appointment with my supervisor once a week. The task is designing an injection mold that has adjustable/replaceable cavities and a mechanism to hold a piece of UD (unidirectional)-Tape in place, so we could inject all kinds of plastic (it’s just PP and PA, really) onto the tape and fuse them together reliably. UD-Tape is a long and thin composite made by soaking glass fibers with molten polymer.
I’m not going to bore you with more gibberish, so here’s something that might be more relatable: the productions of new parts haven’t been going too well. I ordered them on Dec 21st last year, yet the company I work with hasn’t been able to find a manufacturer that’s capable of making these parts for me.
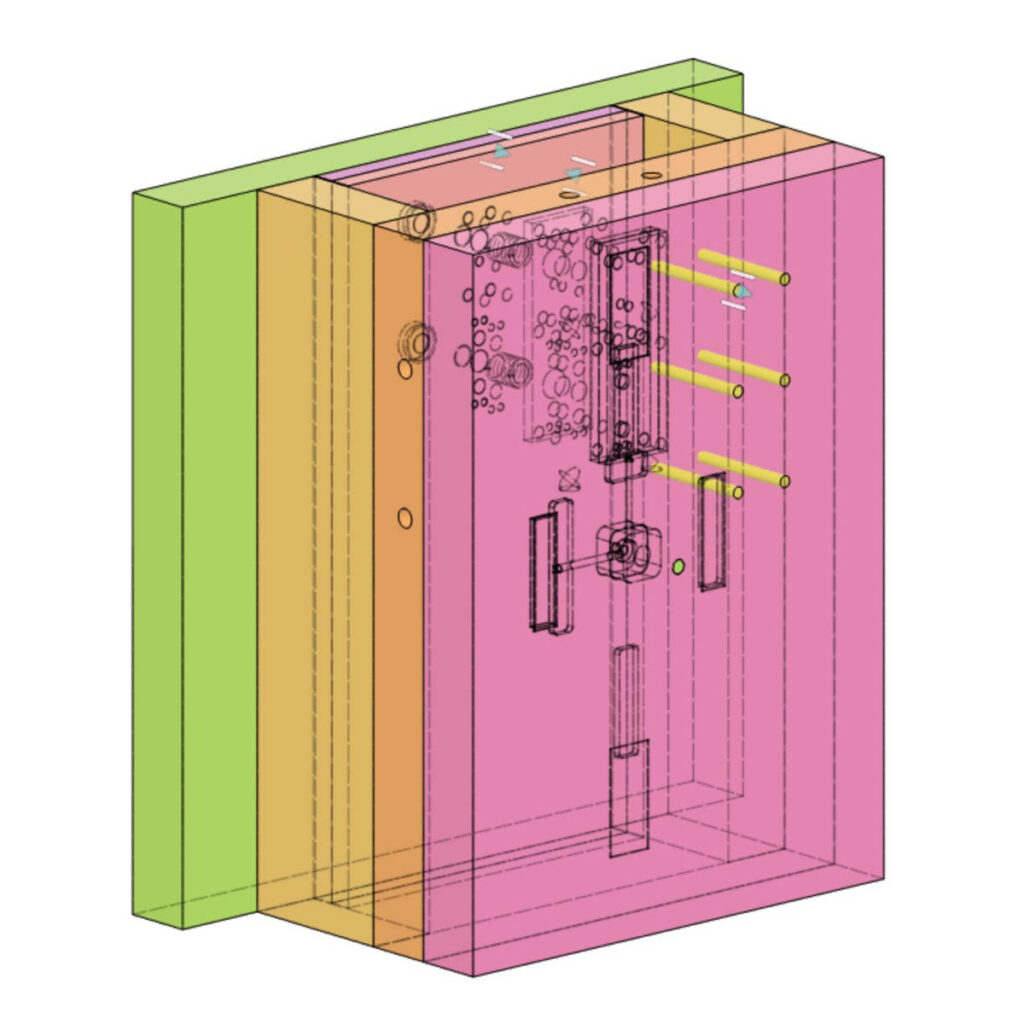
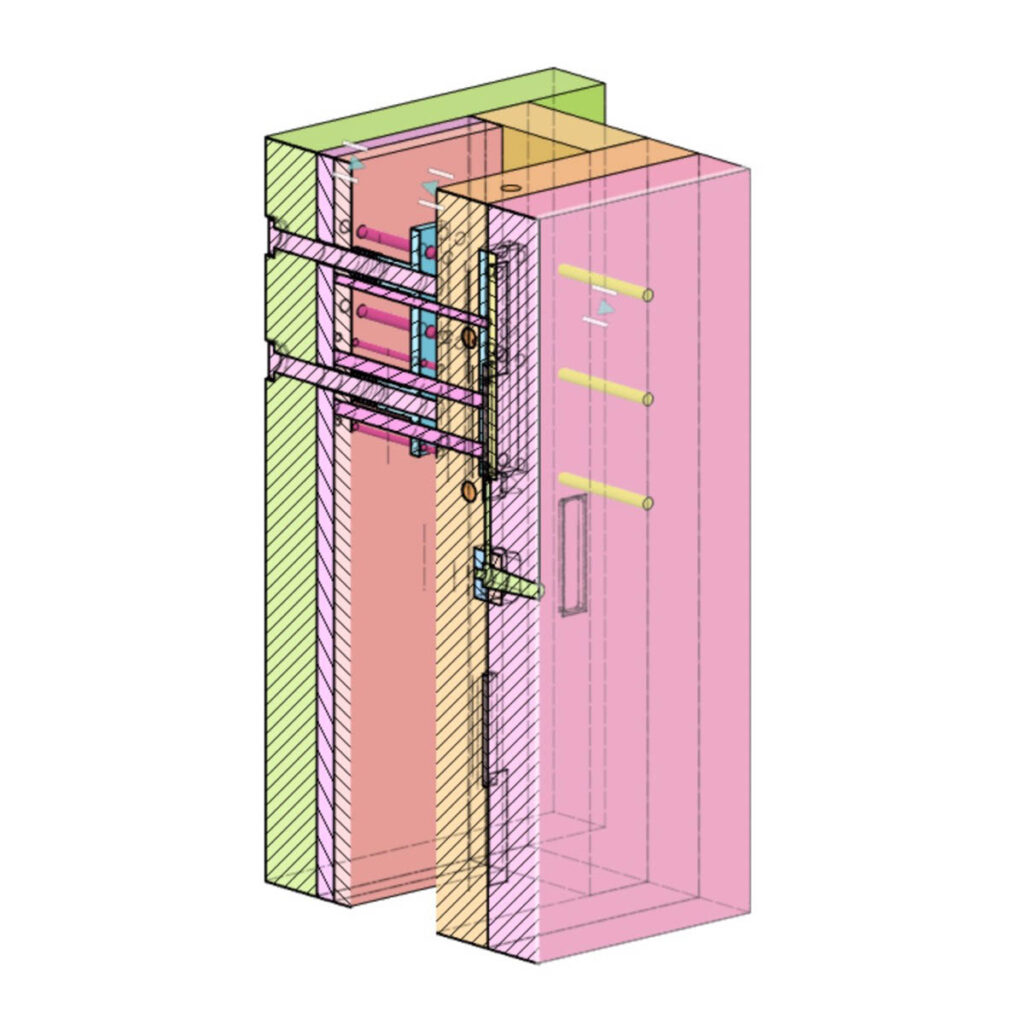
I first had the genius idea to join the crank arm and shaft into a single piece:
This cuts down the manufacturing costs significantly, and I can save a step in the making process too. Before, I had to attach the crank arm to the shaft with a tiny set screw.
Placed the order, everything looked great.
A couple of days went by, the order status was still “allocating manufacturer” which is a bit odd. Got in touch with the customer service, and indeed no one was willing to take the job.
7075 and anodizing is not a good combo. Due to high zinc content, anodizing would lead to black spots on the surface which I believe customer wouldn’t accept.
them
The failure rate to anodize on 7075 is very very high. Together with the complex design, the bid ended up to be really expensive.
I ordered black anodized 7075 Aluminium before but there was not a problem at all? In hindsight, it was probably just an excuse because this thing is difficult as hell to machine. I had no choice but to break up the part into two more manageable pieces: the crank arm and the shaft.
Sent over the files, thinking it should work now. The production status actually changed to “producing parts” which was definitely a relief.
However, a few days later, I got a DFM (Design for Manufacturing) report from the manufacturer. They said they were not able to achieve what I want and suggested an alternative.
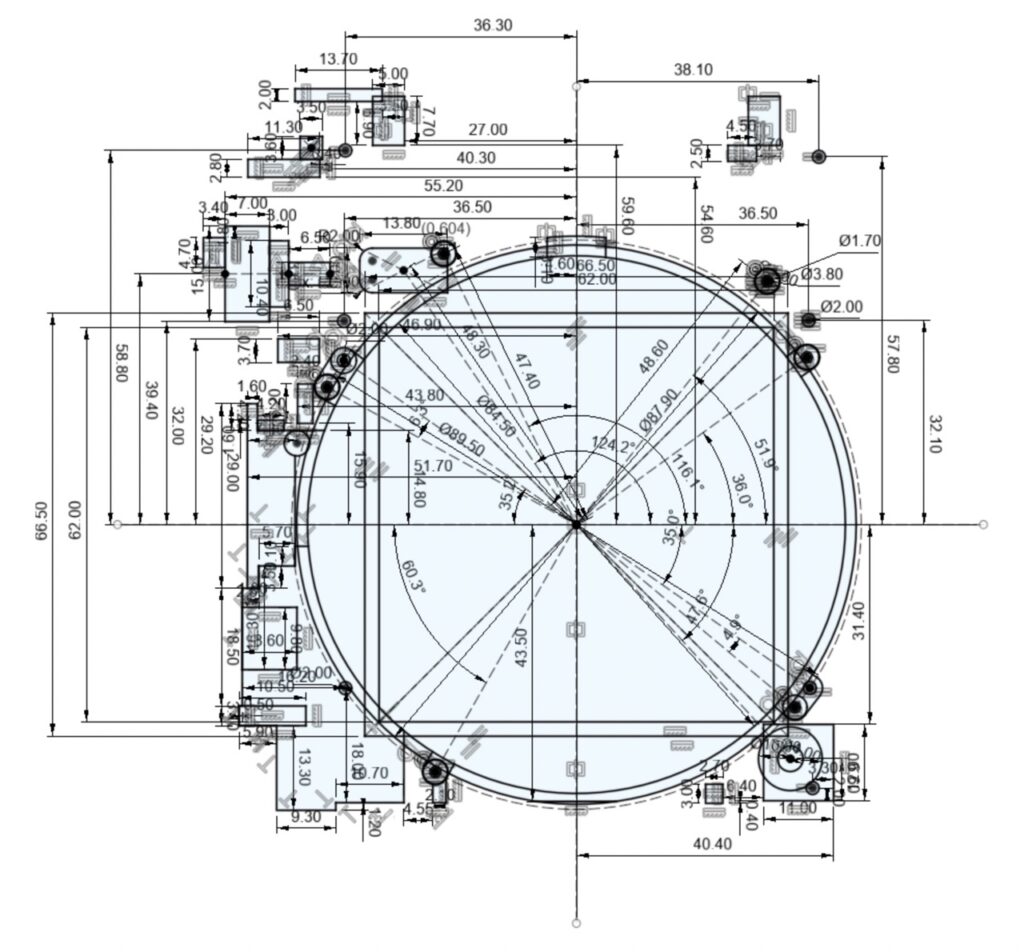
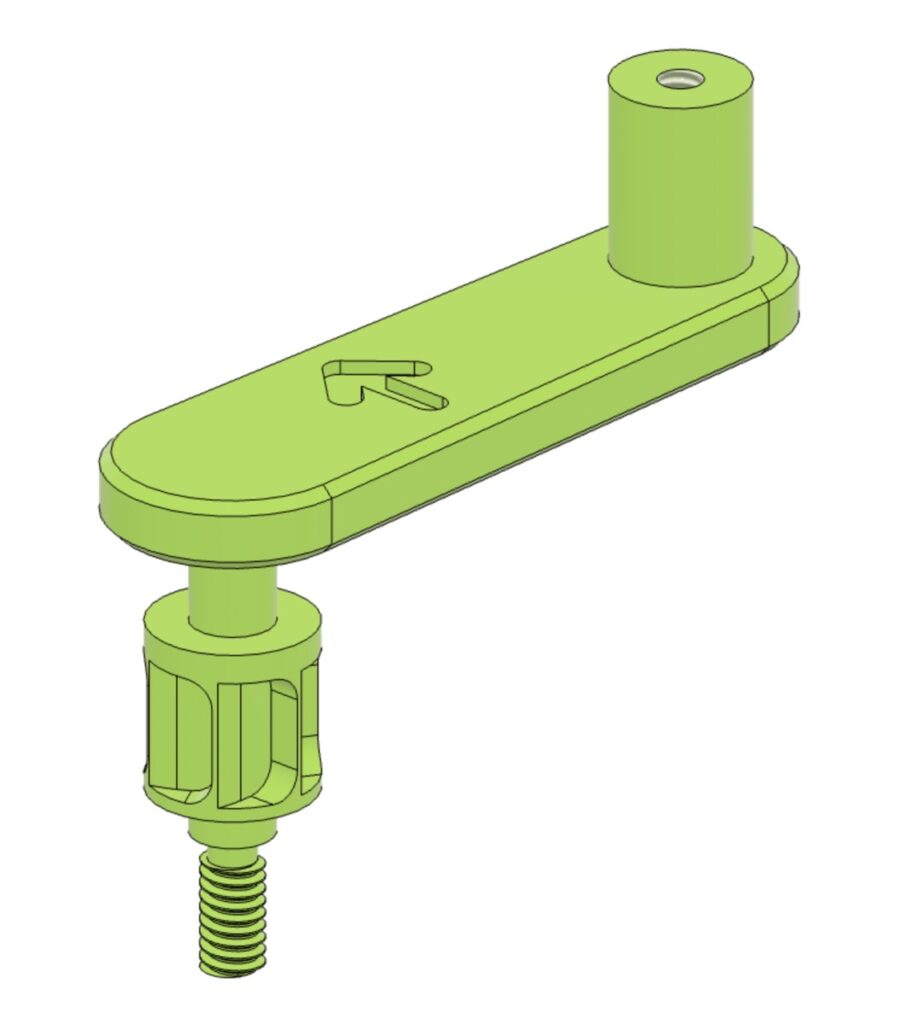
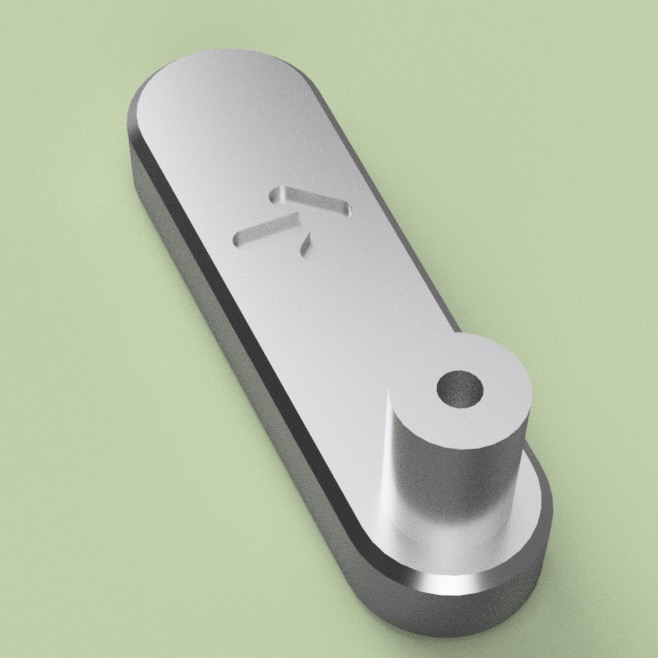
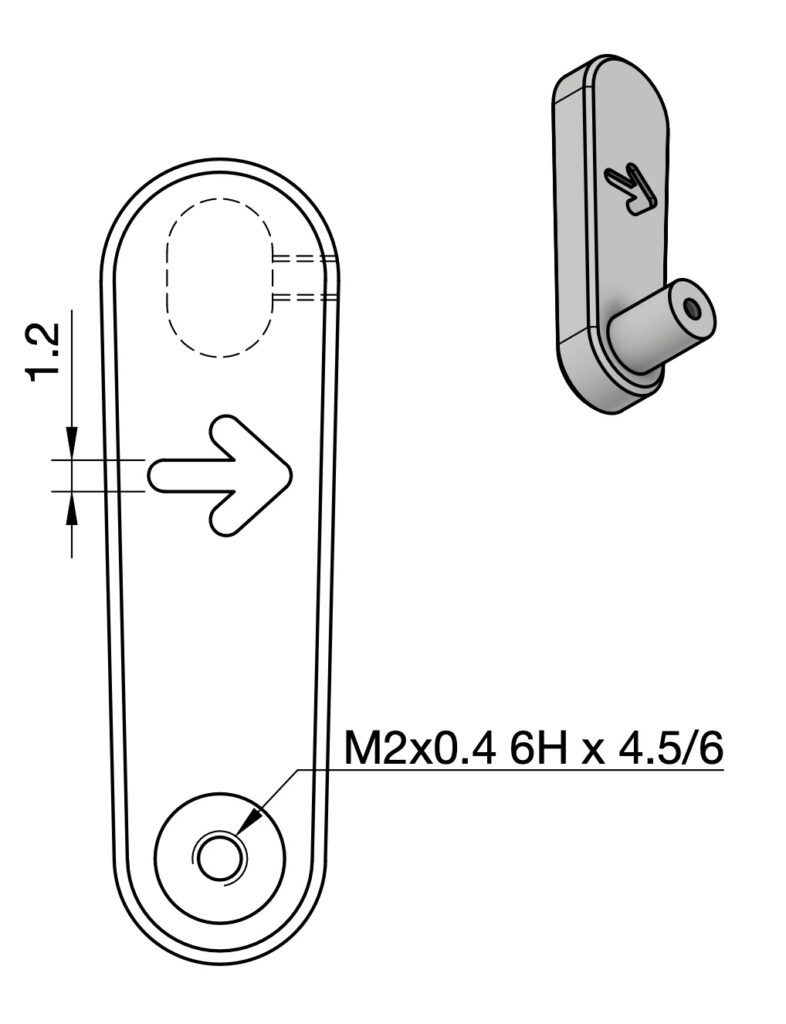
Just for reference, the crank arm looks like this, the arrow should be milled with a 1.2 mm (3/64″) end mill:
Now take a look at this abomination:
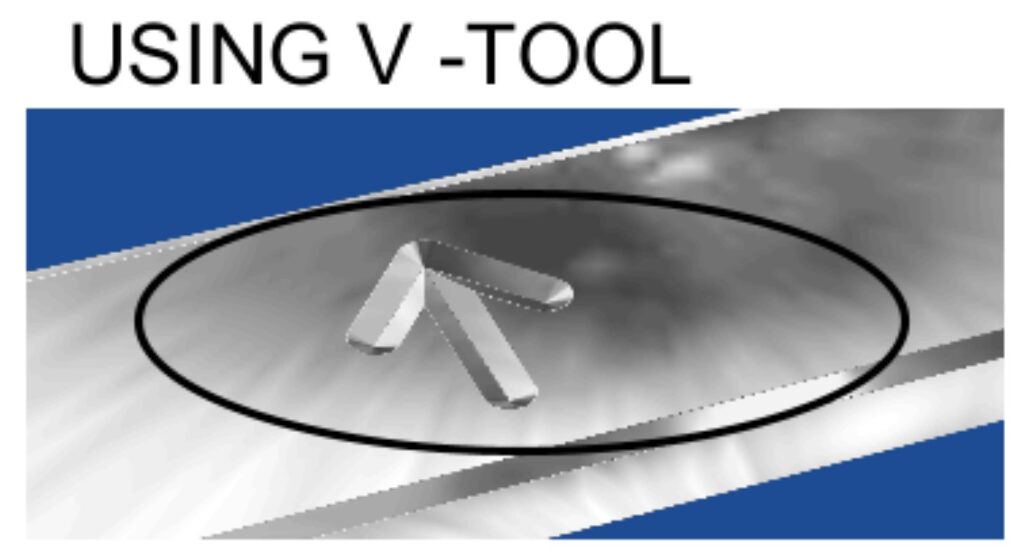
NO, GOD, PLEASE, NO.
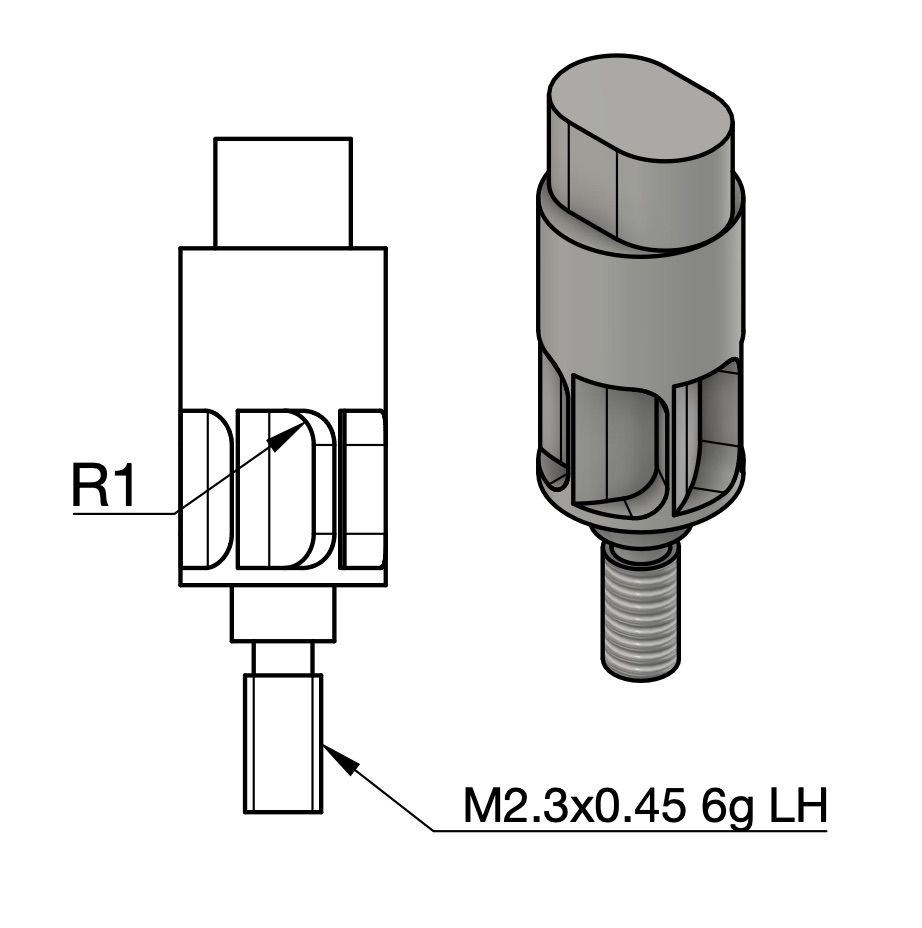
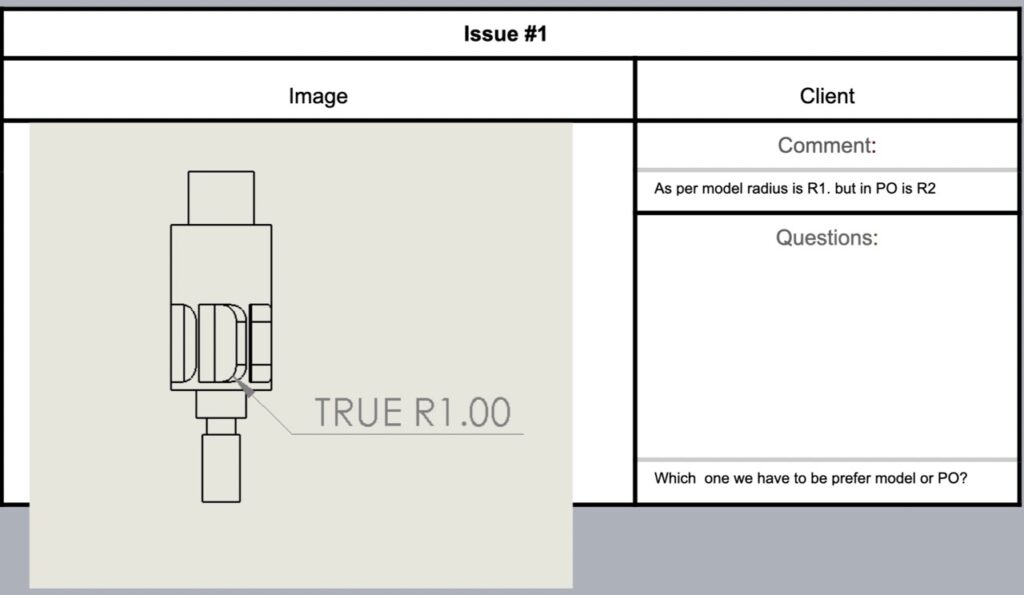
As for the other part, the shaft:

I think it can’t be more obvious that the marked radius has to be 1 mm (1/32″).
They are confused because I specified that all internal corners can be machined with a 2 mm radius. But does that look like an internal corner to you? Dude, that’s a fillet.
On top of that, they said M2.3 is an oddball thread size so they can’t do it.
Fine. I’ll give you that, M2.5 will do too.
A few days later they got back to me and said they can do the usual M2.5, but not M2.5 LH. “LH” means left-hand thread. It has to be a left-hand thread or otherwise the crank will run loose overtime.
So they (the company who outsources manufacturing) refunded me after trying to allocate another manufacturer in Europe who can take on the job but to no avail. They told me I’ll have to wait until manufacturers in China start taking orders again after the Chinese New Year, they are definitely able to do it because they’ve done it for me last time. They also apologized because that super incapable manufacturer apparently didn’t have a clue of what they’re getting into and just went ahead and clicked the “accept order” button.
Waste of my time, and your time too.
So that’s why you haven’t been hearing back from me for a while. Basically, I’m too busy working on other stuff, plus I could’t get new parts in time.
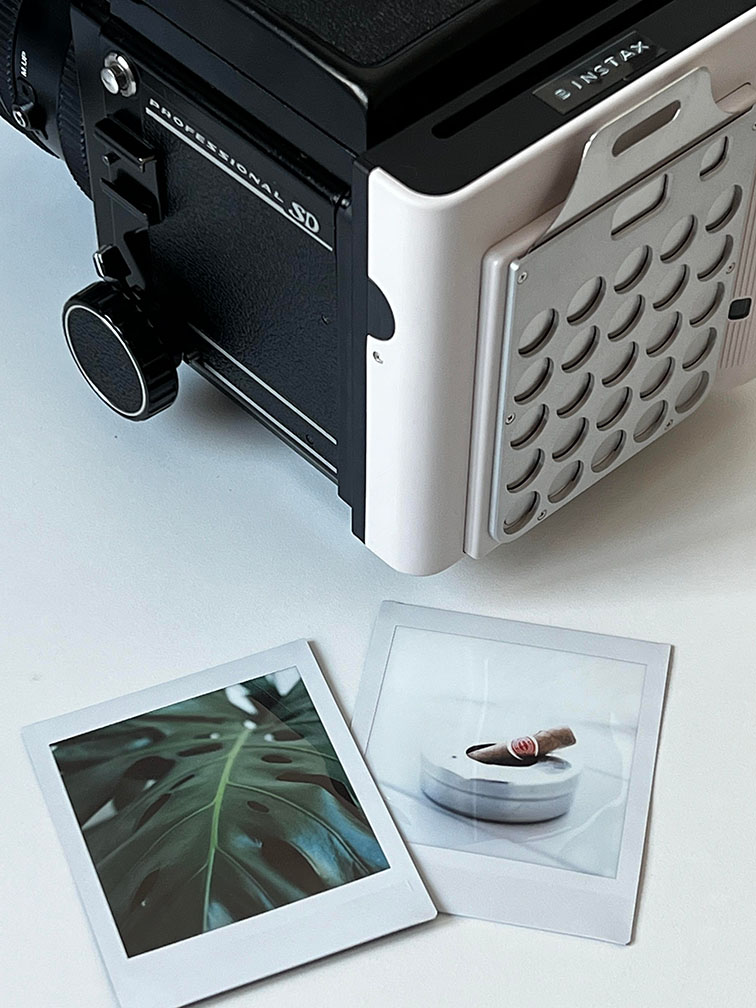
Don’t be too hard on yourself man.. I’m sure the community want to see your photos with Binstax as well. Take the cameras out and spend some quality time with them.. I’m sure it will help with all the problems.
P.s. tried laser engrave the arrowhead?
Laser engraving was an option but I thought it’s just doesn’t look as nice.
Hi Han –
I’m a hobby machinist (who’s patiently waiting for next batch of zinstax) but thought I’d offer some of my thoughts after reaching this blog.
When milling, one want to minimize tool pressure, e.g. when using an 1/4″ end mill to machine a pocket internal corner with 1/8″ radius, the tool will engage the material a lot more at the corner, causing the tool the chatter resulting in a bad surface finish. Therefore one want to use a tool that of which the radius is smaller than the feature and interpolate it.
Which is to say, to machine the arrow feature, I’d use a 1mm tool instead of a 1.2mm, so the cycle time will be a lot longer which eats into job shops’ profit margin.
Alternatively, there are a few tools that will produce a nice engraving:
* Use a ball endmill rather than square endmill if you’re OK with not having a square wall, this way it’d be a single pass so the cycle time remains low.
* Lakeshore Carbide makes tool specifically for engraving that produces very nice result, I like it better than a ball endmill because the engraving is finer. I’m sure there are tooling companies in EU that make similar product: https://www.lakeshorecarbide.com/020balltipforstandardengraving.aspx
This video is a good overview into different engraving options: https://www.youtube.com/watch?v=4Le6AxorcZI
Oh the shaft, I’m honestly surprised that a LH thread is what’s stopping them, the part is almost a perfect candidate for a swiss lathe, or a dual spindle, y-axis live tooling lathe. And single point thread a LH thread isn’t hard at all.
I do agree with them that making this as one piece is a lot more complicated and expensive, looks like you want them to be slip fit with a set screw on the side? I’d spec it so that you take into account the anodizing if so. Alternatively, have you considered either 1) put another LH thread to interface between the two parts therefore no visible gaps/holes, or 2) countersink the handle and LH thread the shank, and source a LH flat head screw to connect the two?
Best,
Derek
Hi Derek!
Thank you so much for your super detailed and valuable input!
I’ve actually already received the crank arm with the arrow engraved on it. The quality is BAD. I’ll post another post with some pictures, but basically I asked them to scrap the whole batch.
The chamfers were totally inconsistent with extreme chatter marks. The pole where the knob goes on is measured to be just a hair less than 0.1 mm larger at the base and slightly better at the top across all 10 pieces I randomly picked. I told the customer service that they should just drop this manufacturer from their network if their crappy CNC machine shows this level of tool deflection when machining such a small and trivial part, and they also probably didn’t take dimensional changes due to anodization into consideration because holes are smaller.
To add salt to injury, on some of the parts they obviously added the chamfer free-hand with a drill because the chatter is horrendous.
Oh and I forgot to mention, they reduced the depth of the arrow from 0.5 mm to 0.3 mm without reaching out to me first.
I ordered the same part before and the quality was top notch. There are some pictures in this post: https://zins.tax/hopefully-final-update-before-binstax-ships/, so I was really shocked how much worse this batch end up to be.
That you use a 1 mm endmill to engrave the arrow made totally sense, thank you for this tip! I don’t have much practical experience in machining though I really wanted to own a milling machine or a lathe someday. I’ve been re-watching This Old Tony on YouTube lately, by the way, not sure if you heard of him (I guess you do). His videos are always entertaining and enlightening, I can’t get enough of him.
I wanted the bottom of the engraving to be flat because I want to color the arrow white with some kind of dye, so the V-tools might be out of the window. Do you happen to have any suggestions on what dye I should use? I’ll have to look into that. I did that before on some of the 3D printed parts using acrylic paint but the results were mediocre, the dye kept seeping over the edge because the surface was rough and the edge was also not sharp enough.
I don’t know if any of their manufactures has a swiss lathe, although it indeed seems to be a perfect part to make on a swiss lathe. I actually thought they would single point thread the M2.3, maybe their lathe is as crappy as their CNC machine, who knows. Another manufacturer has since taken on the job, hope it turns out great.
I honestly didn’t expect that one-piece crank thing to be easy to machine, but it passed the DFM so I thought what the heck, someone will take the job. I’ll save a few bucks for each zinstax/binstax I make and more importantly, I can skip the step where I attach the crank to the shaft. If you’re making, say, 100 zinstax at a time, to be able to skip a single step is really a huge relief. But I guess that’s not going to happen anymore, haha.
You’re totally correct, it’s a slip fit with a M1.6 set screw on the side. It’s strong enough, so don’t worry. I should have made the hole where the shank goes in little bit smaller, because I can’t seem to find a set screw that’s short enough (M1.6 x 2) so it won’t stick out. M1.6 x 3 is around 0.4 mm to long, it’s not perfect but not too bad, I guess.
Finally, to your suggestions:
1) I did consider that, but I didn’t want to make the crank arm too thick so there are enough fully formed threads. A through hole is not aesthetically pleasing, let’s not go down that road. I reckon you could also cut the threads with a single point threading tool in the blind hole, but let’s make the their life just a little bit easier.
2) I don’t want any visible screws on the crank, so that’s not an option either.
Cheers,
Han
Hey Han –
Yes I’m a big fan of This Old Tony, another channel that you may want to check and geek out is Stefan’s (https://www.youtube.com/@StefanGotteswinter), lot of micro machining stuff that you may find interesting.
As for the color fill, I don’t think you will need a square bottom, some corner radius at the bottom would make machining much easier and not affect the quality of the color fill like the V-grove – check out the Kingart pen and Cerakote, in the video you will also see they use acetone to clear the overflow. They have both oven dried 2-part paint as well as air dried w/o catalyst if you don’t have a curing oven setup: https://www.cerakote.com/shop/cerakote-equipment/SE-504/cerakote-color-fill-pen