warning, tons of pictures!
I had the idea to shoot instant films with MF-cameras at the end of 2019. I was on a train, and the legendary FP-100c had long been dead. But what did I know? I began to search the web for interesting products and came across an article about making an instax mini back for the Hasselblad 500C/M. There is also an article on 35mmc on the make of an instax mini back for the RB67. But no one seemed to have made anything for the RZ67.
I then bought the Rezivot Polaroid back when the conversion kit was still available, but I didn’t like that the pictures are sideways and mirrored. The focus seemed to be off by just a few tenth of a millimeter too. And no, it was not because I tightened the screws too much. I had two of these mods and both of them are the same.
As a self-proclaimed perfectionist, I decided to make my own instax back, just because instax films are cheaper. I snapped a broken instax SQ6 off ebay when 2019 was just about to end.
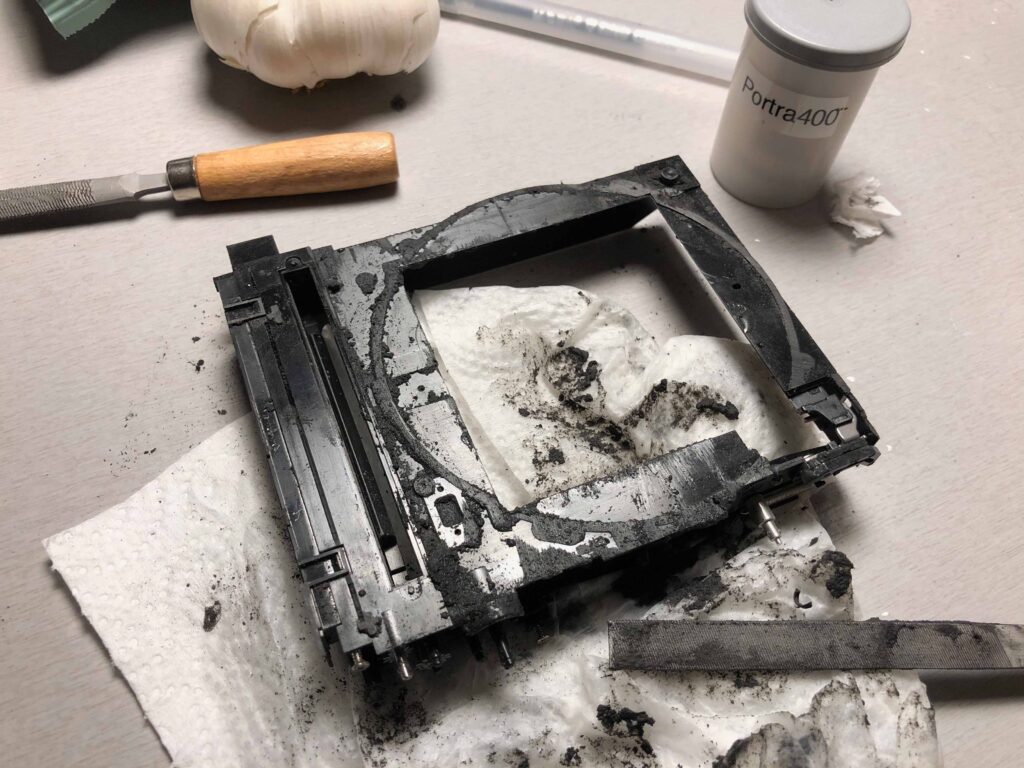
I took it apart and it turned out it’s actually feasible to make a film back out of it.
My first thought was simply attaching a mounting plate to it with screws and glue.
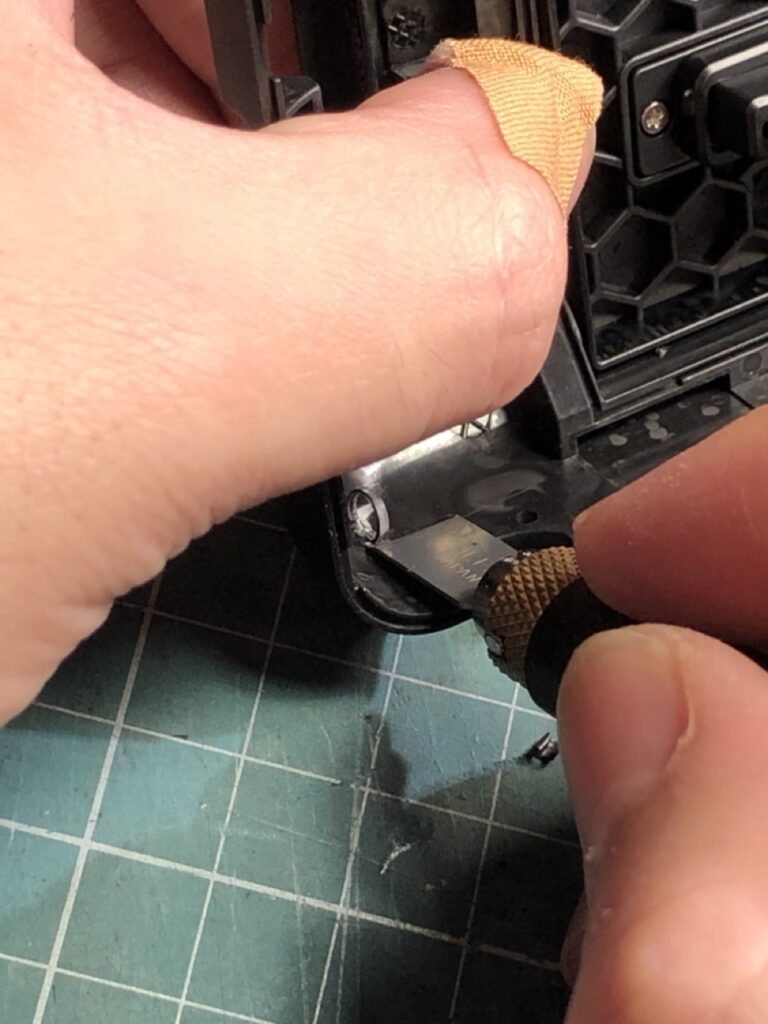
I used files which was stupid. And yes, it’s a garlic bulb in the top left corner.
I sat on the balcony of a friend freezing to death carving away material with a Dremel so these two parts fit together.
It took me, I don’t know, maybe an hour. My Dremel was way too underpowered because I didn’t want to invest too much in this personal project, so I bought the cheapest one I could find that is still in good shape on Kleinanzeigen (german equivalent of Craiglist) for like 30€.
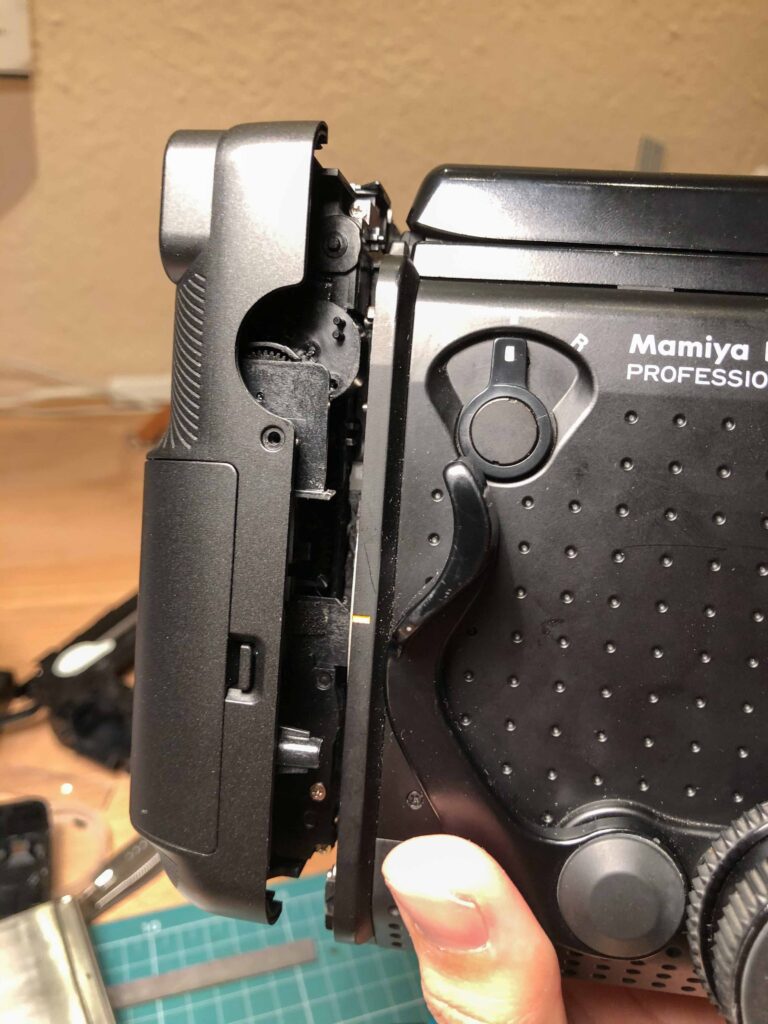
Just wanted to check if it still goes on the RZ, and it does!
Not gonna lie, the steampunk-y look is somewhat unique.
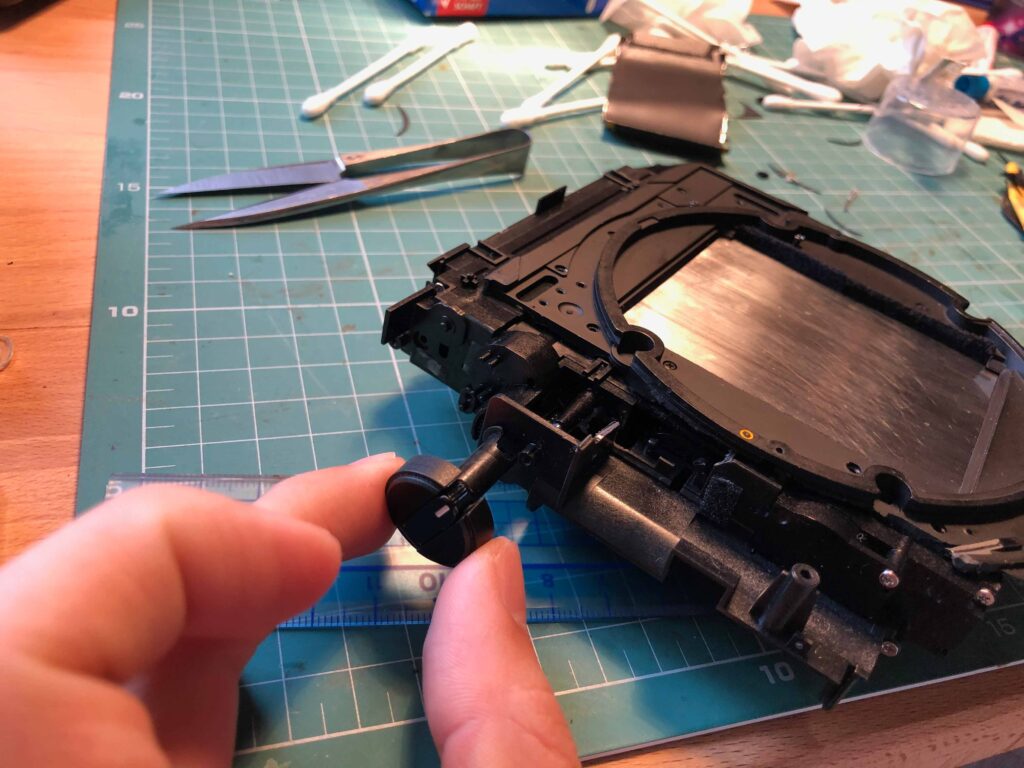
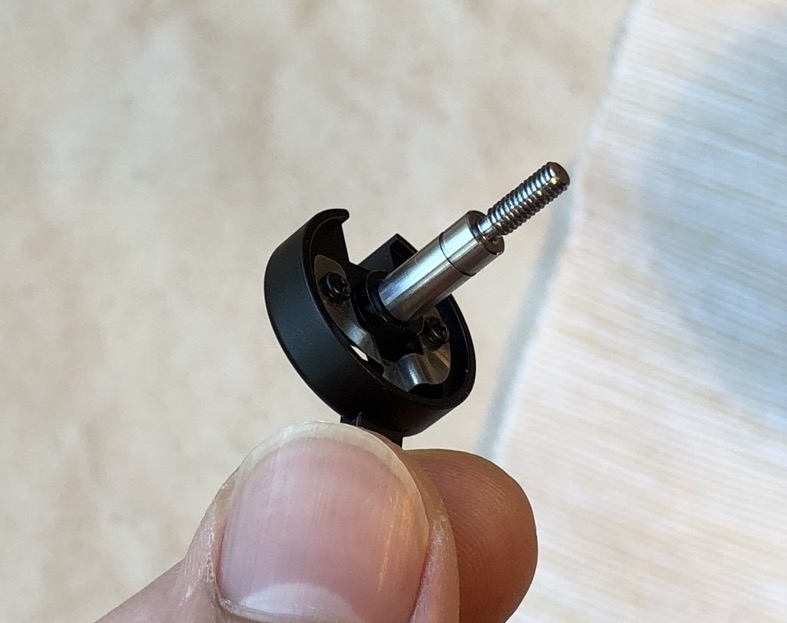
I repurposed a film rewind crank of a broken Olympus XA and attached it to the drive pinion with screw and epoxy.
It’s pretty much ready to go. I couldn’t wait to let the epoxy fully cure and popped in a pack of film.
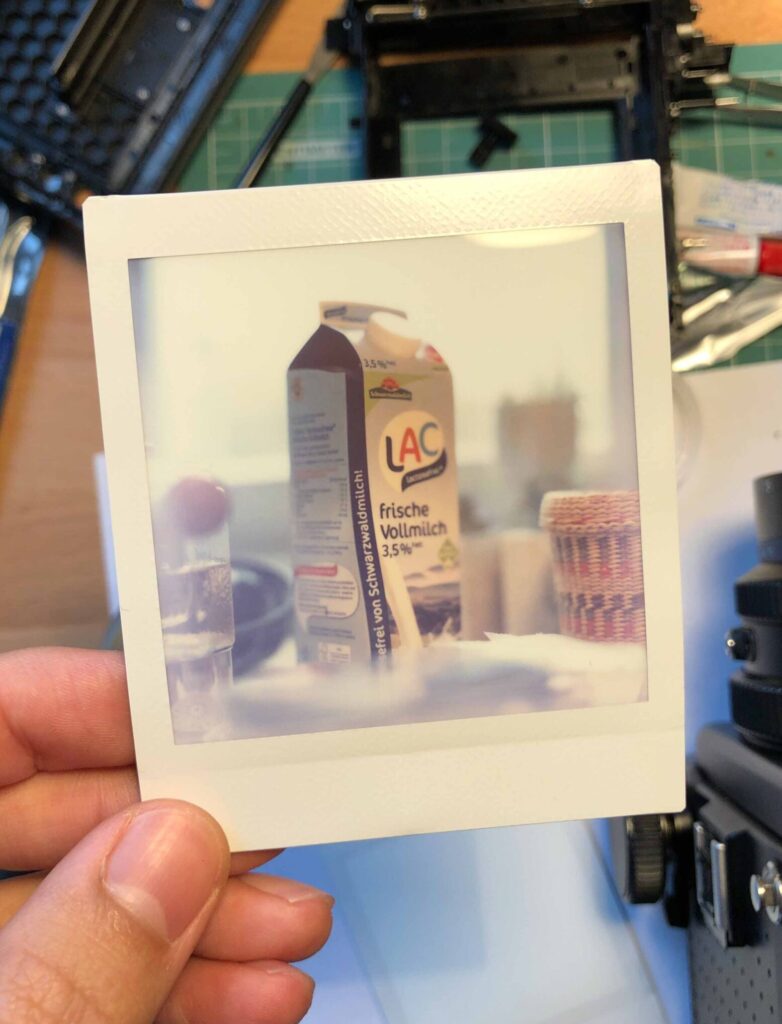
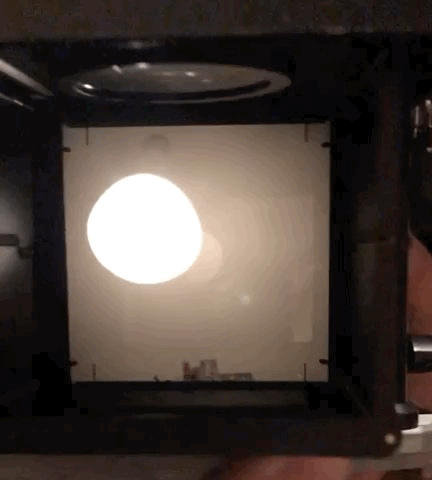
The first shot I took was a carton of milk. It has a variation of colors and the fine print is perfect to check the focus.
I was so excited to see the image pop into existence. The focus seemed to be okay, so I went on and took another one.
And it was blurry.
It’s totally to be expected, but I also low-key hoped that it would magically work out without too much fuss.
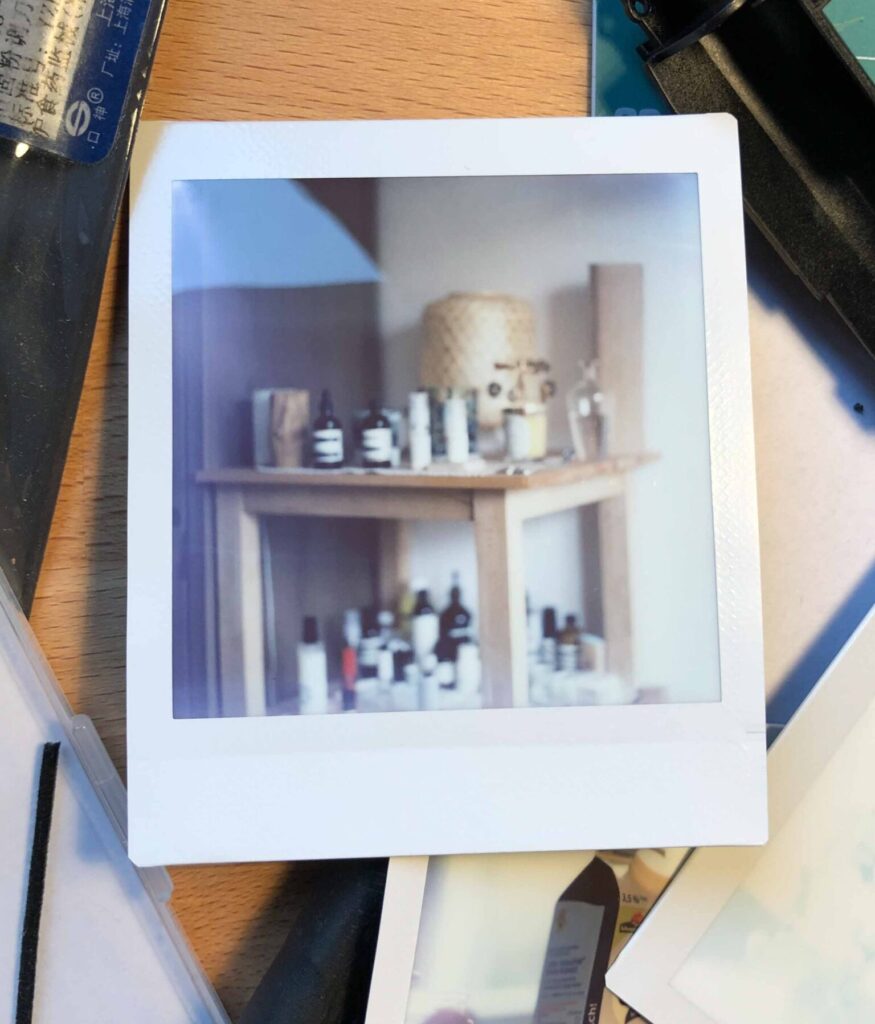
I still had a lot of fun shooting around in my small apartment with my frankenstein instax back that day.
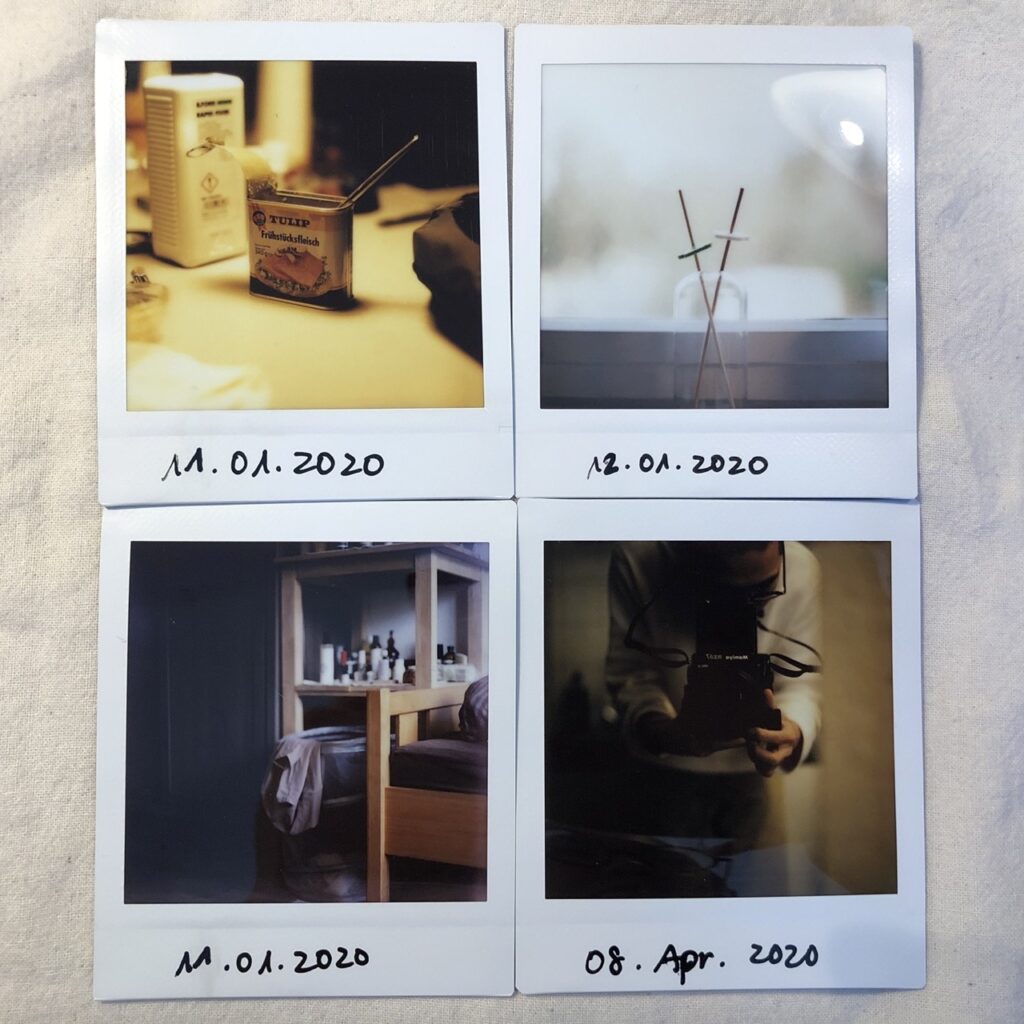
I know these shots are not great…
I was basically just checking the focus by leaving aperture wide open all the time.
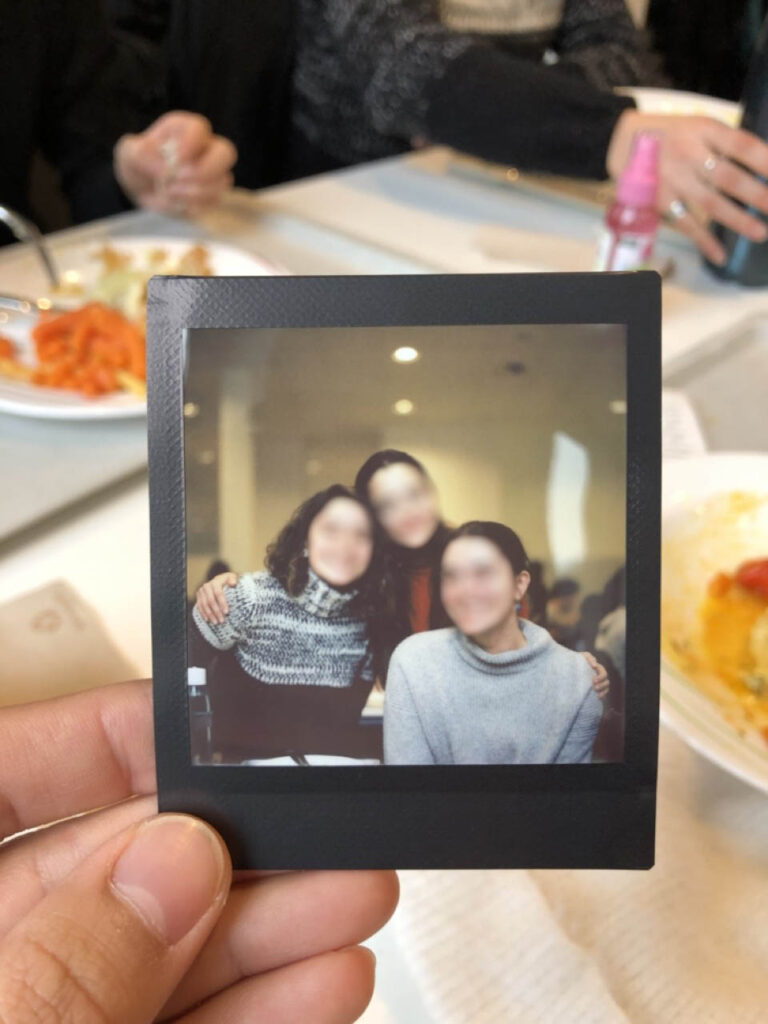
I brought the first prototype to my university’s cafeteria to show it to my friends.
I heard the girls at next table discussing my camera out of curiosity. I talked to and showed them how it works. Apparently they have never seen any camera like this, so I offered to take their group portrait and they happily accepted.
Unfortunately I can’t show you their faces. I took a picture of the film before giving it to them as a gift.
It was a good time.
Also this is a true story. I totally didn’t make this up to prove to you that I, a socially awkward nerd, attract girls by inventing nerdy stuff. Lol. I’m not actually socially awkward. Well maybe I am, but anyway, let’s move on. (awkward face)

However, I just can’t bring myself to use it often because the way it looks always put me off. I need a better looking one, the one that I’m actually willing to sleep with.
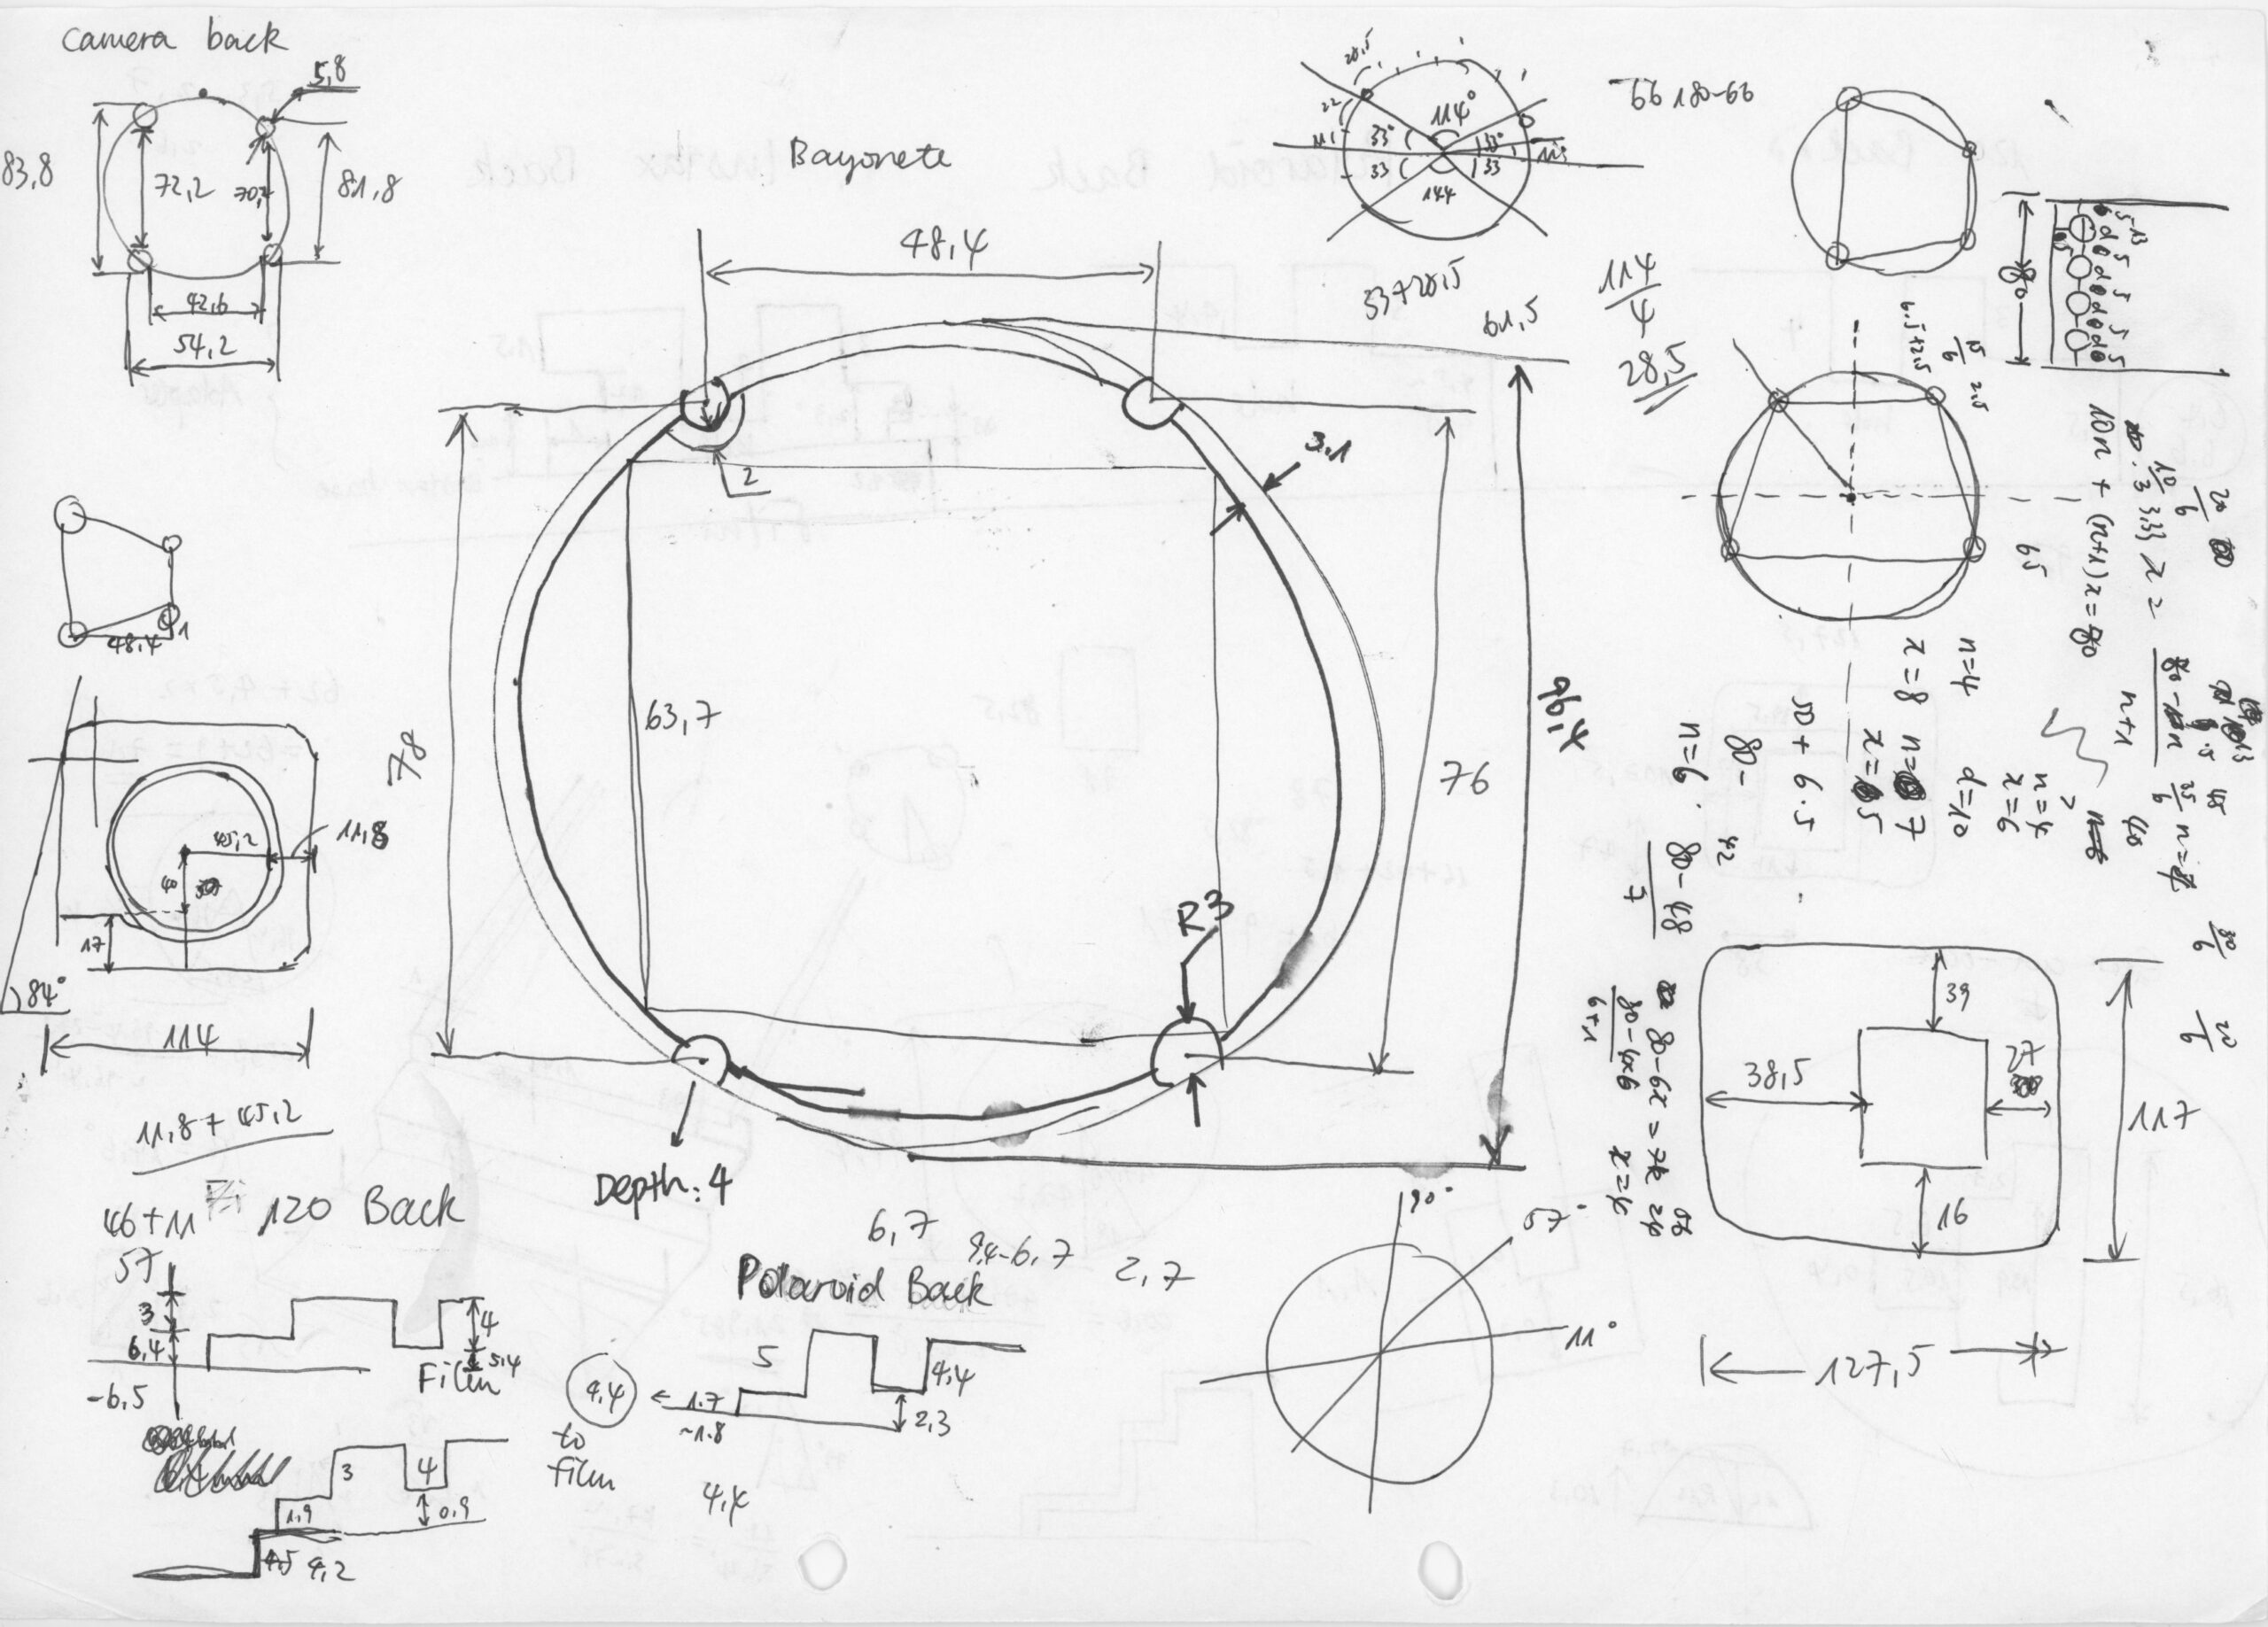
I began to take some measurements.
Achieving critical focus wide open at minimum focus distance should be the top priority, and the only way to pull it off is to design a custom mount for it. If I’m going to make my own mount, I’m going to make it perfect.
I need to know the exact dimension of the SQ6, the exact position of the film opening, how deep the film plane sits, diameter and positions of the locking pins on the back of the RZ, diameter of the locking ring, depth of the holes for the locking pin on the back, central angle between the two locking pins which has to be calculated using law of cosines, … it was a lot of work.
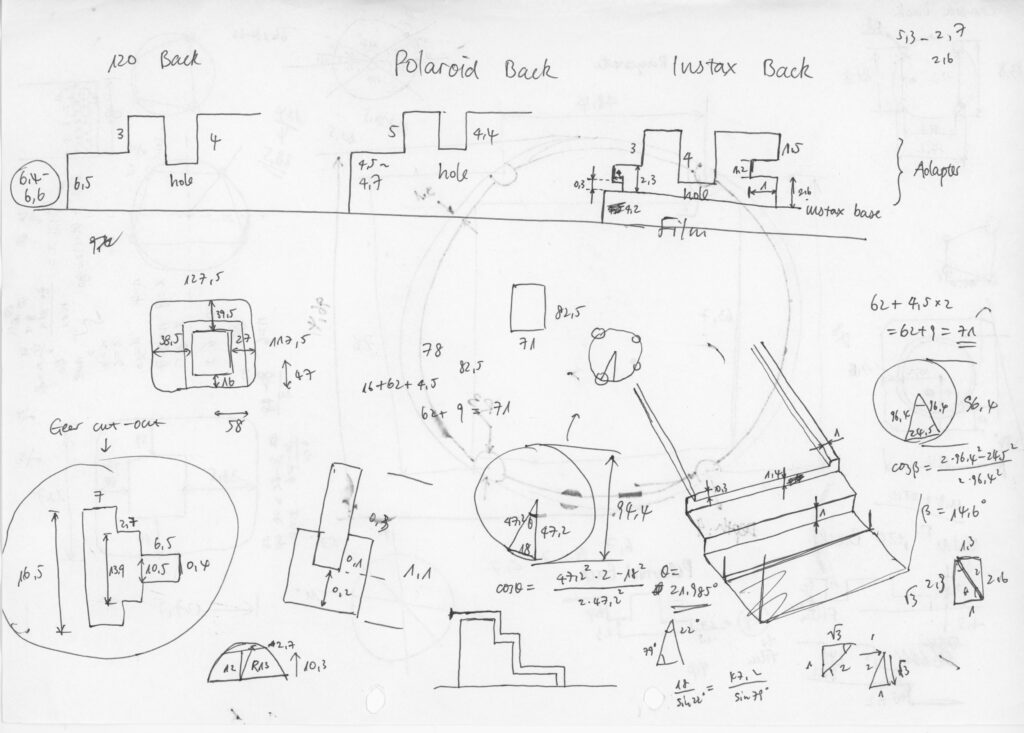
It was at this point that I realized why there hasn’t been an instax back for the RZ on the market.
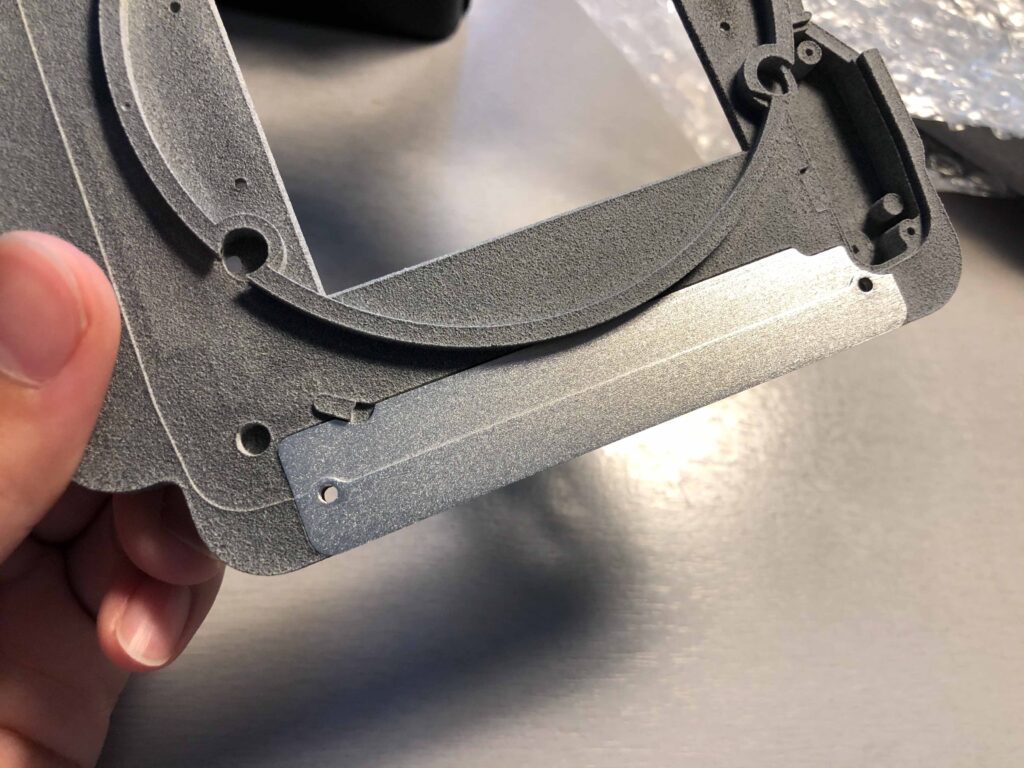
The SQ6 has to be heavily modded, and the mount plate has to be really, really thin. But if it’s too thin, the part may be wrapped due to thermal stress, or there just isn’t enough material to provide structural integrity.
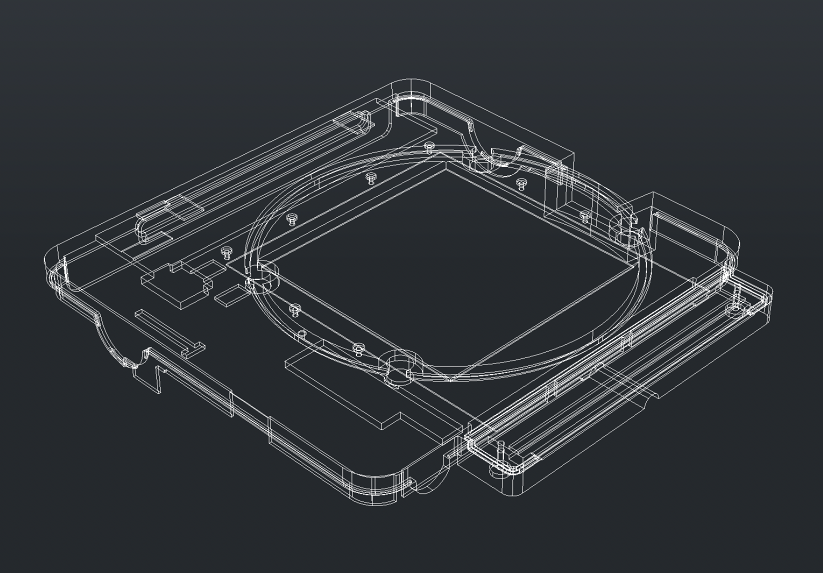
I set off to create a CAD drawing.
It started to look like something.
I even added these protrusions in my model that will go into the grooves of the back housing of the SQ6. I probably spent over a hundred hours on the CAD model before I was satisfied with it.
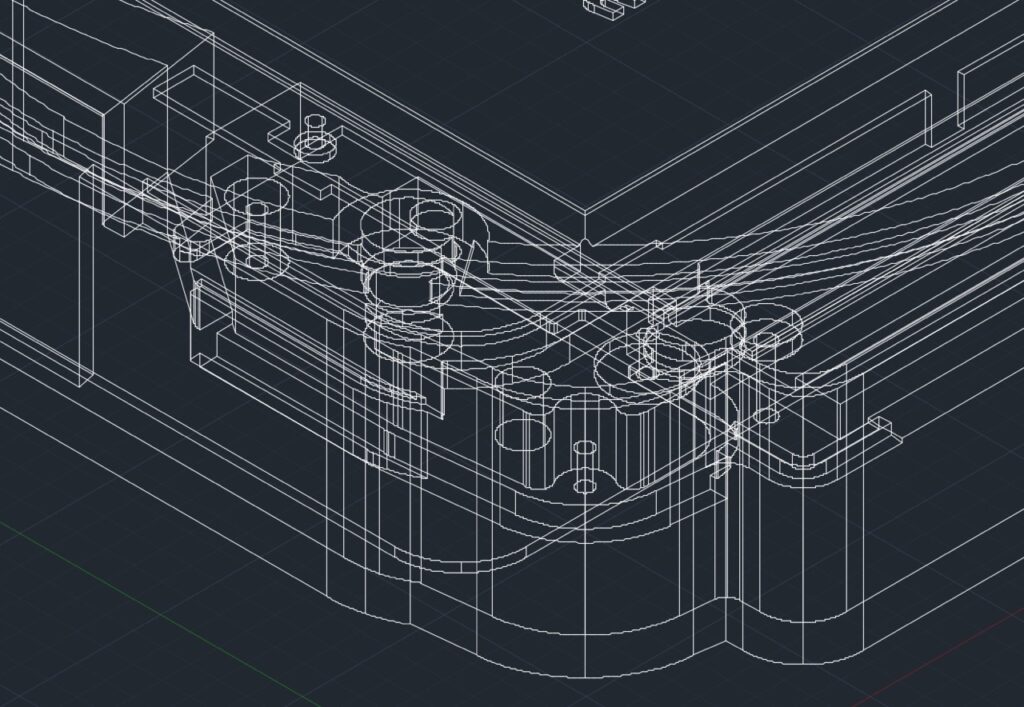
It got pretty messy pretty quickly.
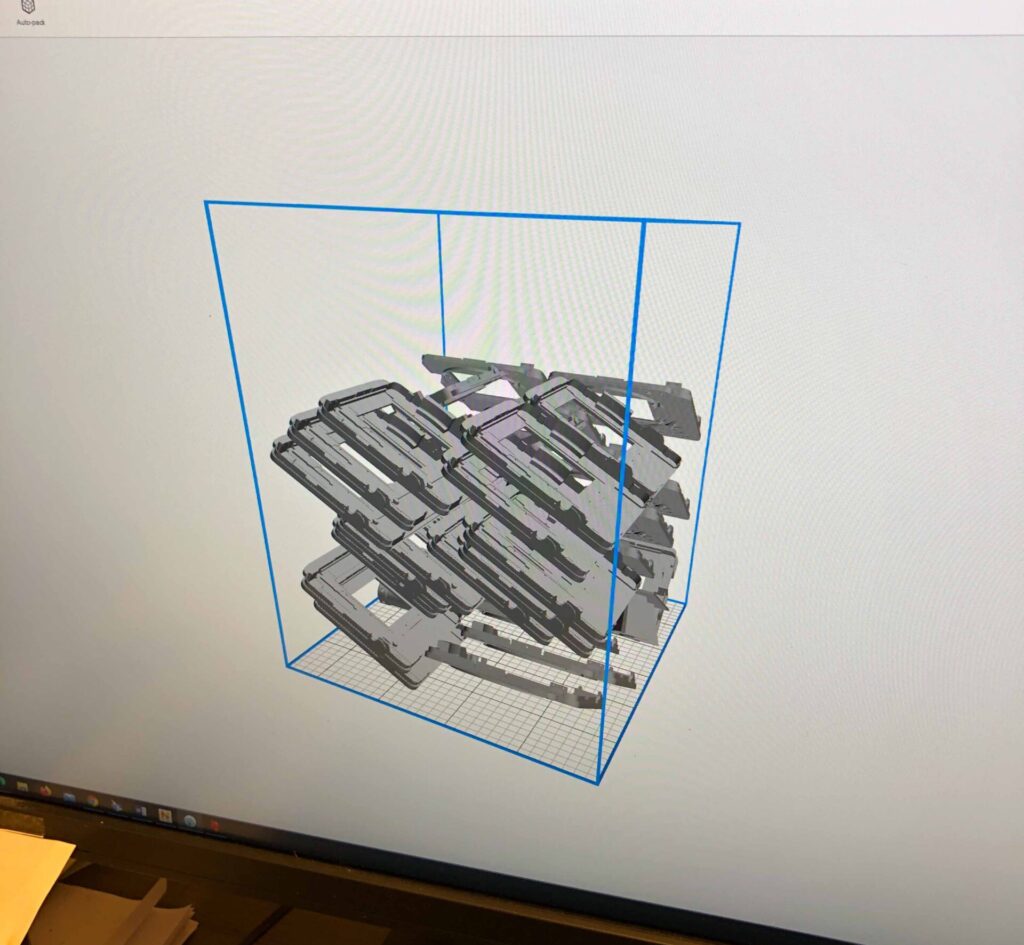
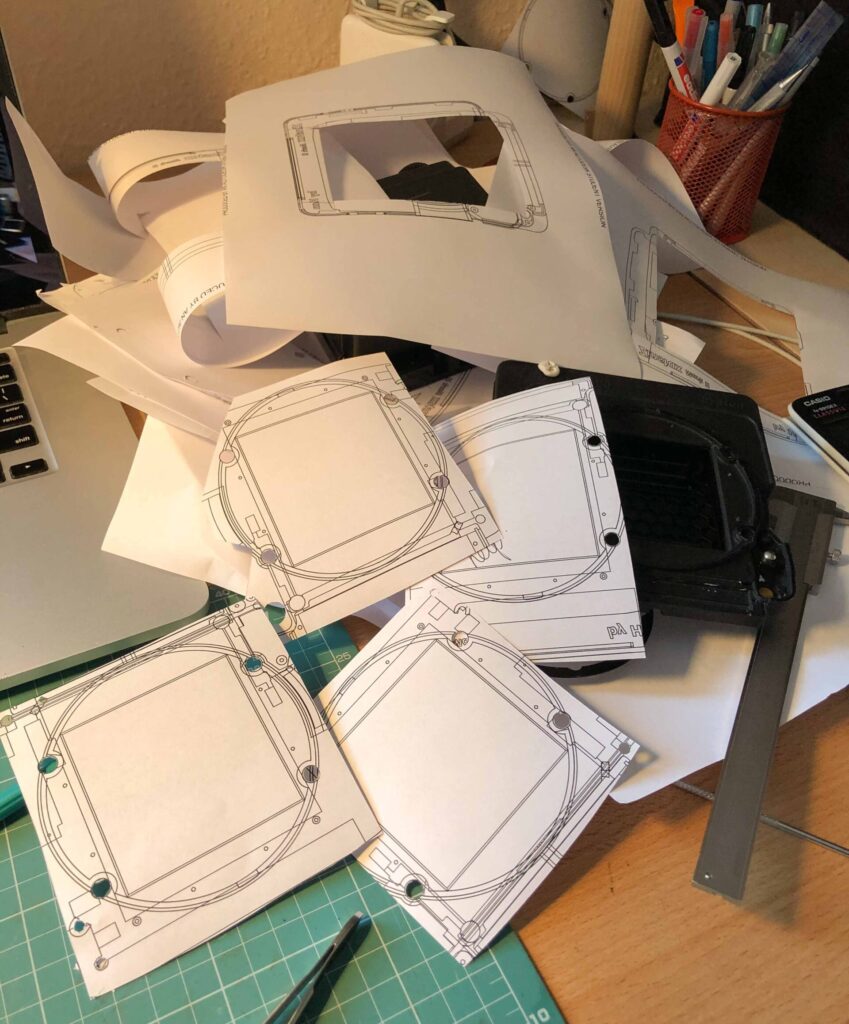
Before putting my design into production, I printed out the top projection of the model, cut out the holes so I can do a “test fit”.
You’re burning hundreds of euros if it turns out that the thing doesn’t even fit.
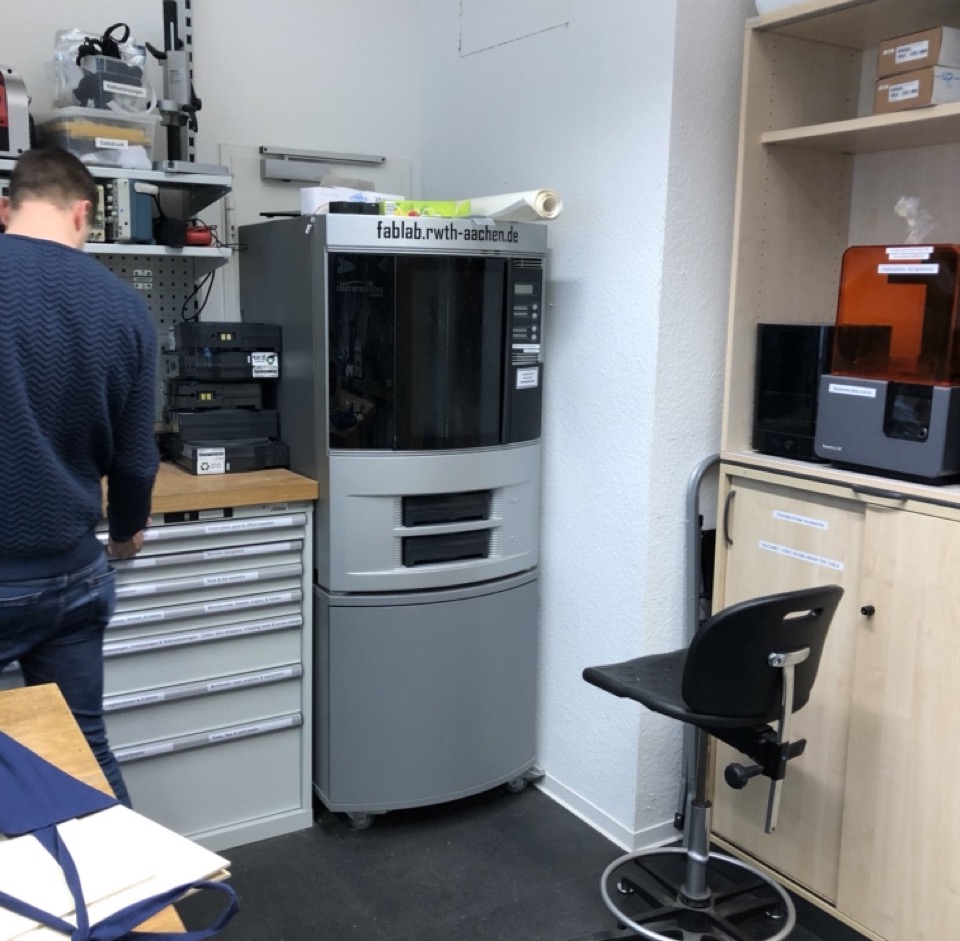
Then I found out there’s 3D printing lab at my university. Every student can give them the file and have it printed. You only have to pay for the material, which was around 20€ for two pieces.

Actually the dude at the lab told me he screwed up the first run because the part wrapped and popped off the printer bed. He then printed another one, but I only have to pay 10€.
I gave him 20€ nonetheless, because he was nice to me.
I tweaked the size and the position of every geometric feature to get a better fit, and finally submitted my file for manufacturing using MJF (Multi Jet Fusion), a high-resolution 3D printing technology invented by Hewlett-Packard that was first introduced in 2014 and became available in late 2016.
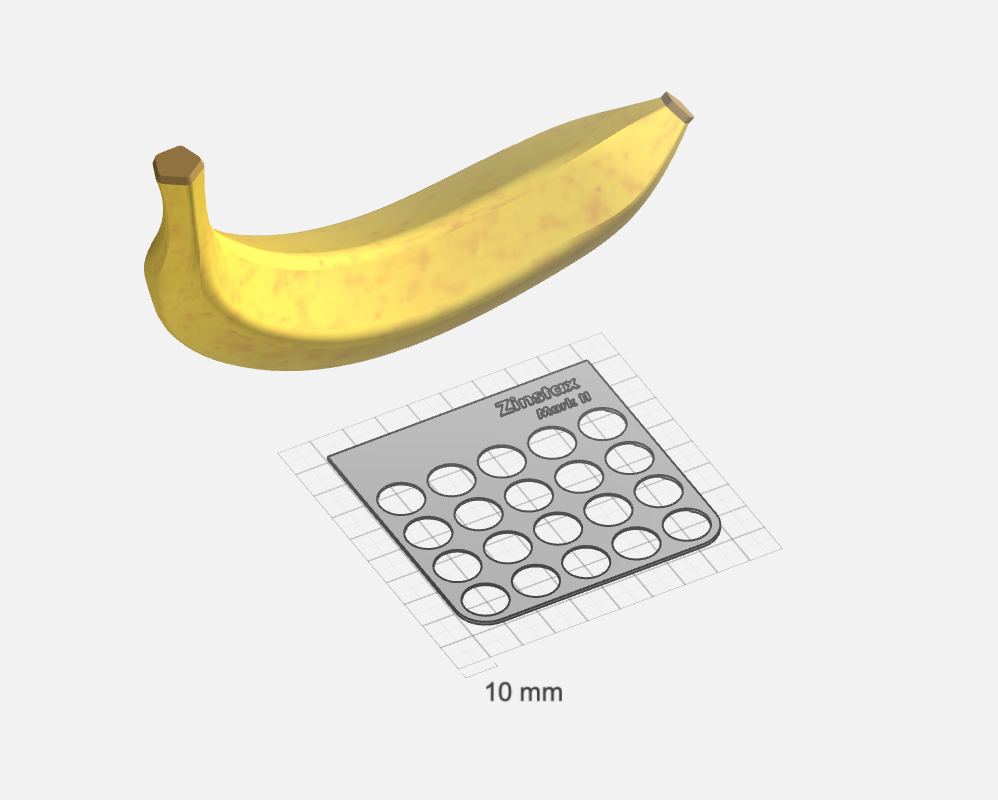
Here’s the size of the dark slide holder compared to a banana.
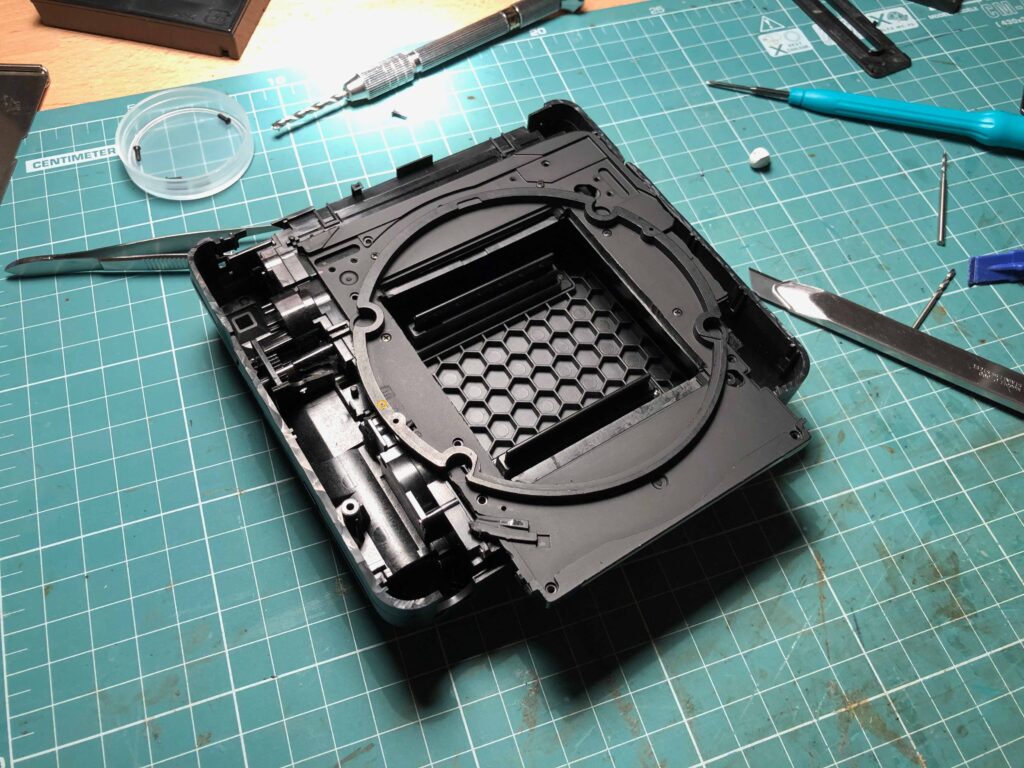
I received the first (serious) prototype in March 2020.
It was made somewhere in Bavaria, the resolution wasn’t as impressive as I would’ve hoped.
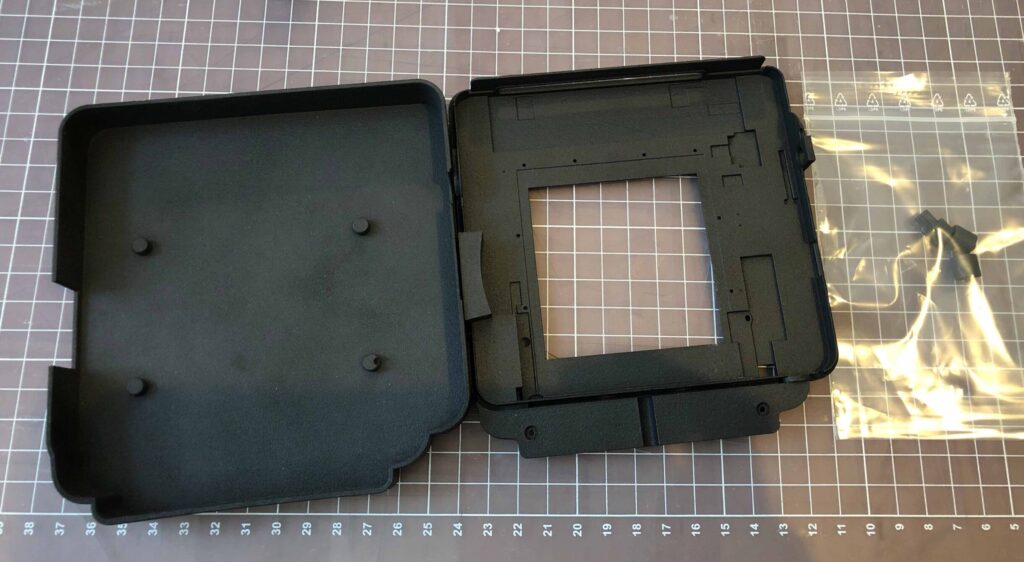
I even made a protection case to go along with it. How cool is that?
My second order came from Belgium. It was so crisp, the edges were sharp as hell. Loved it and checked out their website. I uploaded my file there trying to get a quote, saw the price and forgot about it.
I received an email from Dave on the next day, the guy who printed my stuff, offering help because I left my files on his site.
I told him that he manufactured my stuff and he actually remembered it.
Not long after I paid him a visit.
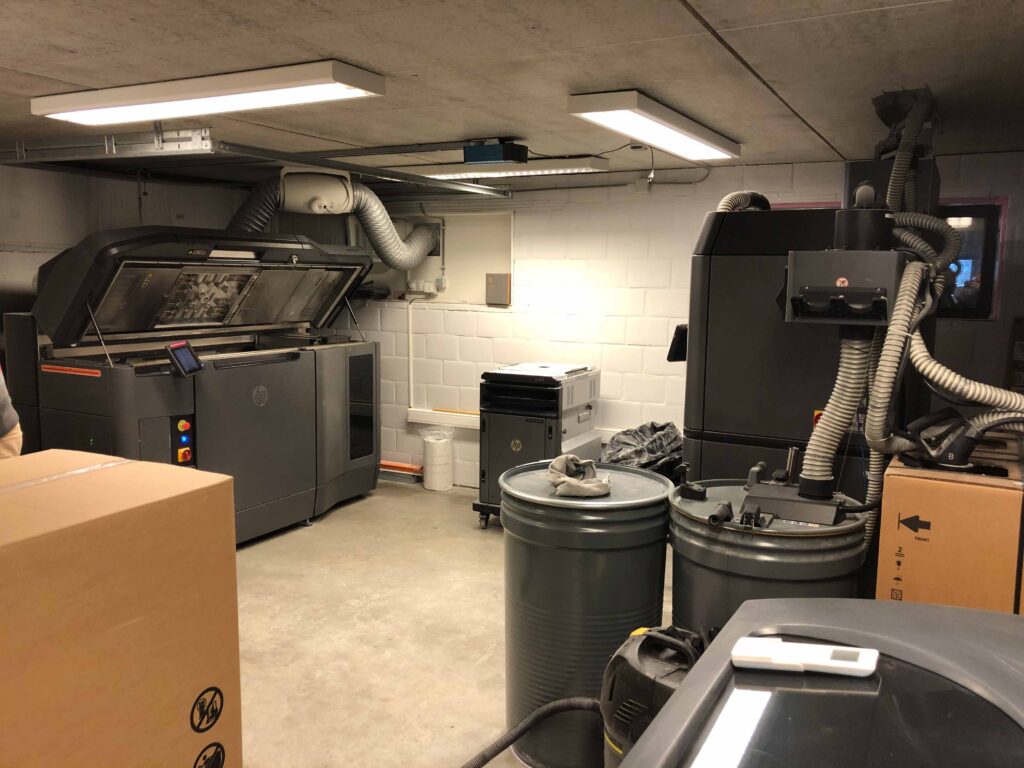
It turned out Dave tinkers with his dad in their garage.
This is his 400,000€ 3D printing machine. Fun fact, it is actually the very first MJF machine that was put into commercial use in the whole world. He didn’t know that until HP told him at delivery.
Dave is a very down-to-earth dude. Shout out to Dave!
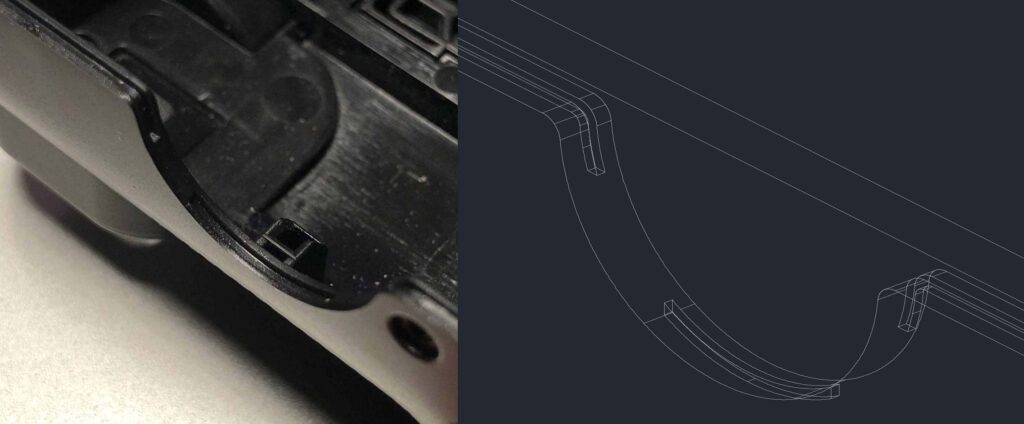
Ensuring the zinstax is light tight when the dark slide is pulled out is a challenge.
A friend of mine had an instax back for the RB, it came with two dark slides, one long and one short. You’re supposed to insert the short one into the back to keep light from getting into your back when you’re shooting, and insert the long one when you’re about to take it off.
How janky. And how do you prevent light from getting in during the swap?
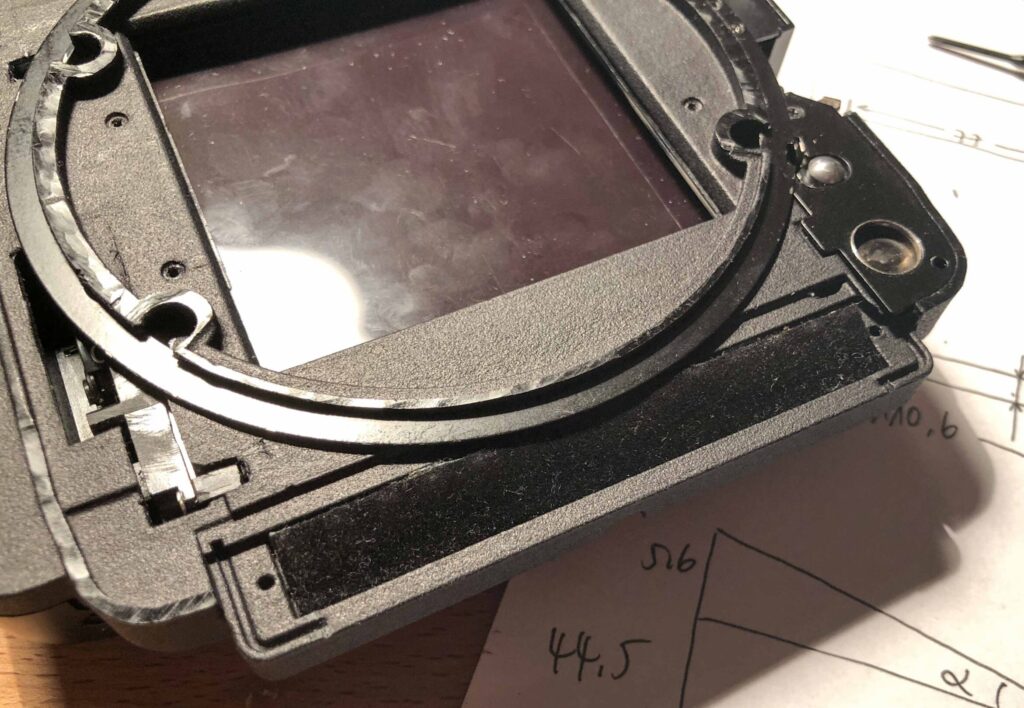
My idea was to re-use the light seal from the Polaroid back. It’s a piece of sheet metal spring with one side covered in velvet. It works great, but it takes up a lot of space.
I came up with a more compact and more robust solution later. Genius.
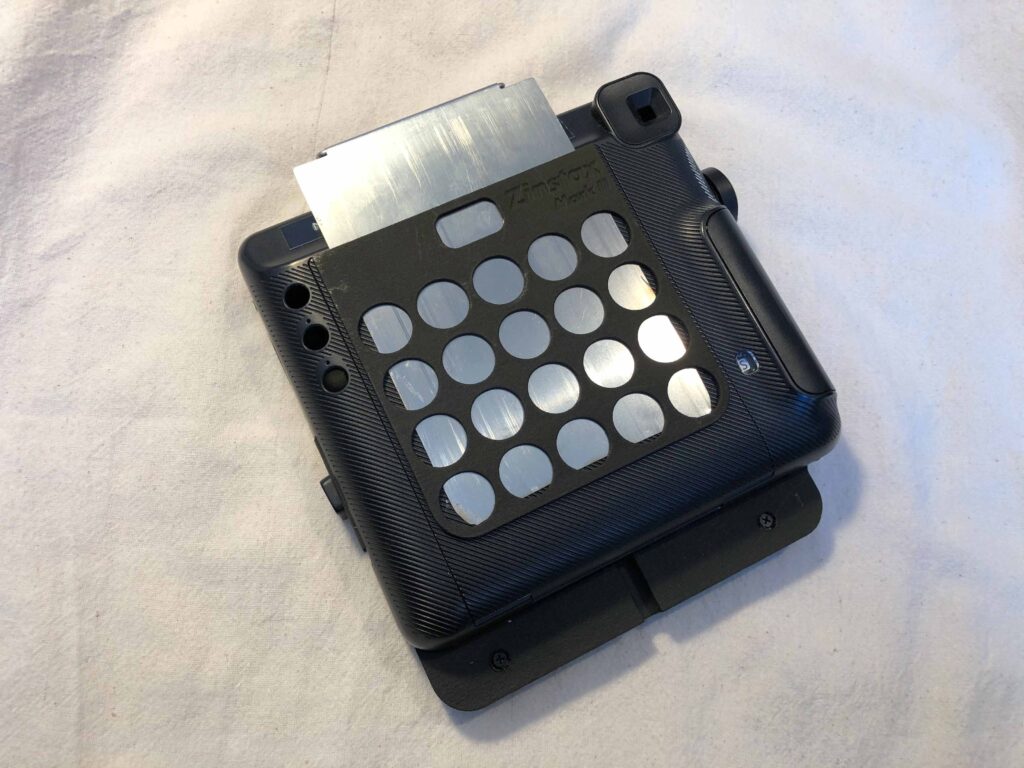
This is how the dark slide holder looks like now. Credit: @fr4nkfi3n3 on IG.
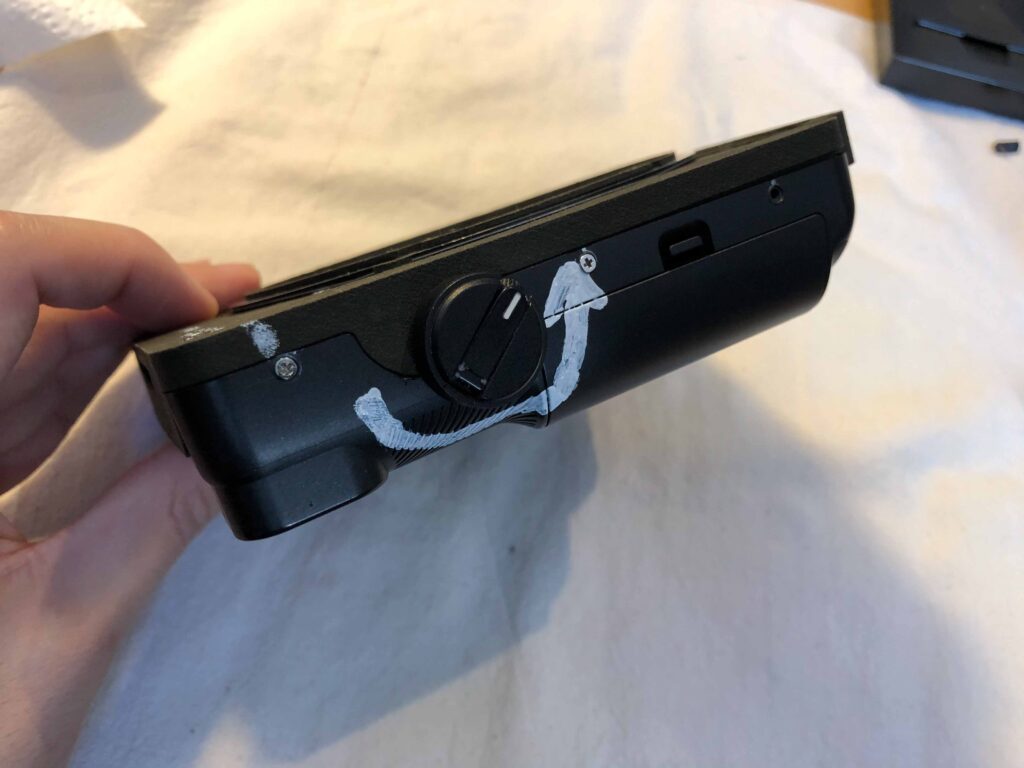
I can’t stress enough that you should never turn the crank in the wrong direction. These tiny nylon gears inside will break as they are not meant to resist that amount of moment.
With that being said, I broke it by turning it in the wrong direction the first time I brought it outside.
So I drew a big white arrow with a paint marker to remind me of that. Soon after it just became muscle memory.
I sold one of my two early prototypes to Steve in Japan (not this one) to get some money back as this project had already burned a hole in my pocket.
I was swamped with DMs on IG one day when I woke up and I didn’t have a clue, until someone told me Steve posted some pictures of it in the facebook group (RZ67 lovers) and left my Instagram there for contact.
Shortly after that, @anojan on IG hooked me up with Willem Verbeeck. I still couldn’t believe he sent me a DM saying he was interested in my product. I agreed to send him one for review, but it never arrived. it arrived A COUPLE OF months later.
I hit him up again, offered him a second one. He said he was in Europe and it turned out he was an hour’s drive away.
We met up and the rest is history.
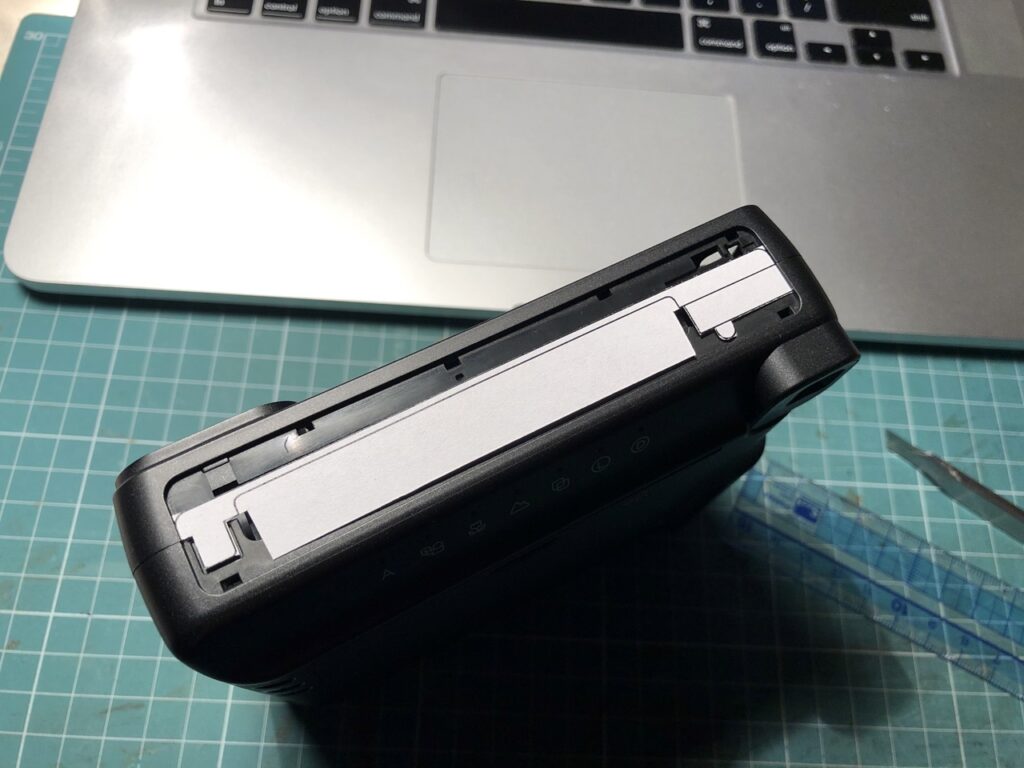
The first prototype worked great, but it had a few flaws.
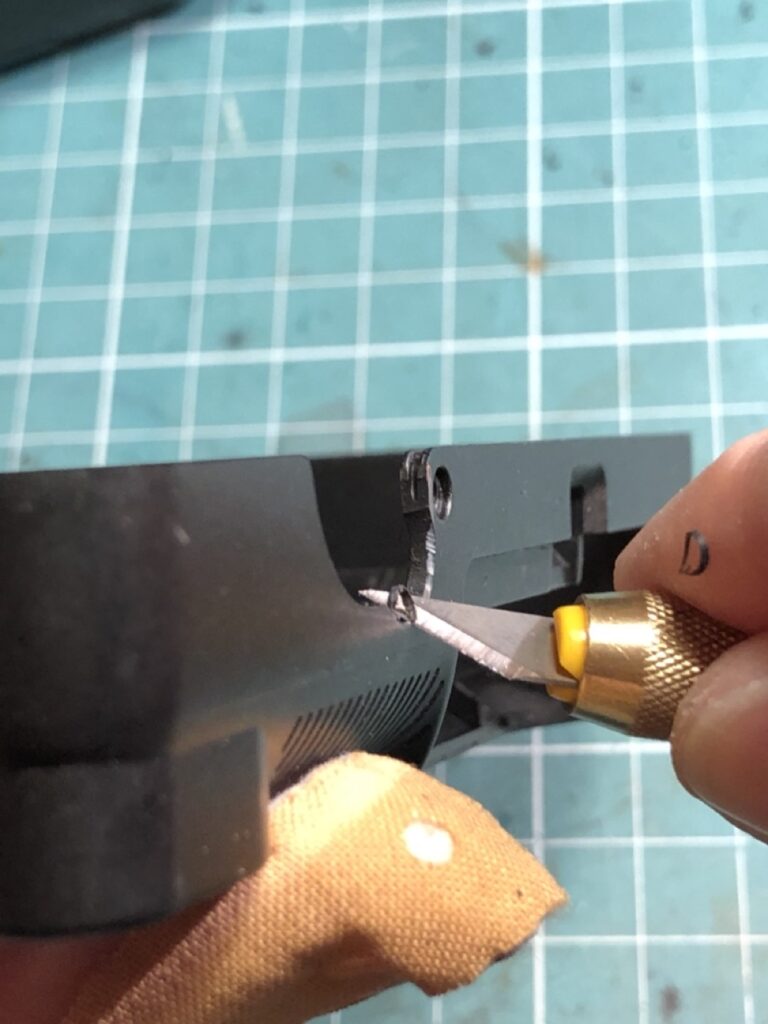
In case you didn’t know, there’s a small metal pin which should prevent the zinstax from turning, when the R-M lever is not set to R. There must be a hole on zinstax to couple with the pin. I figured out the exact position of the hole by carrying out my tried-and-true print-and-cut-to-see-if-it-fits method.
Another example of my print-and-cut-to-see-if-it-fits method.
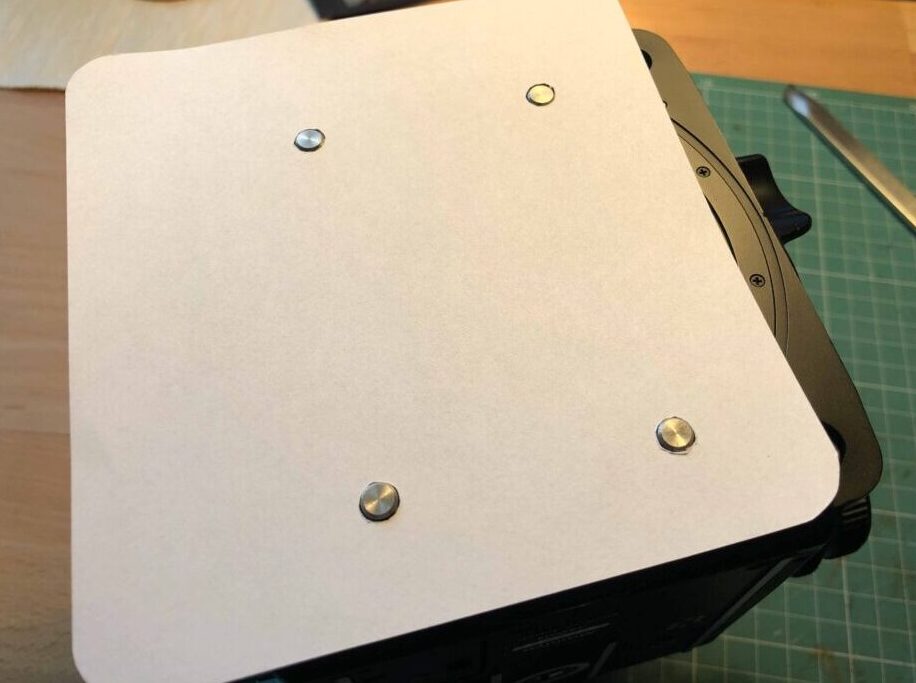
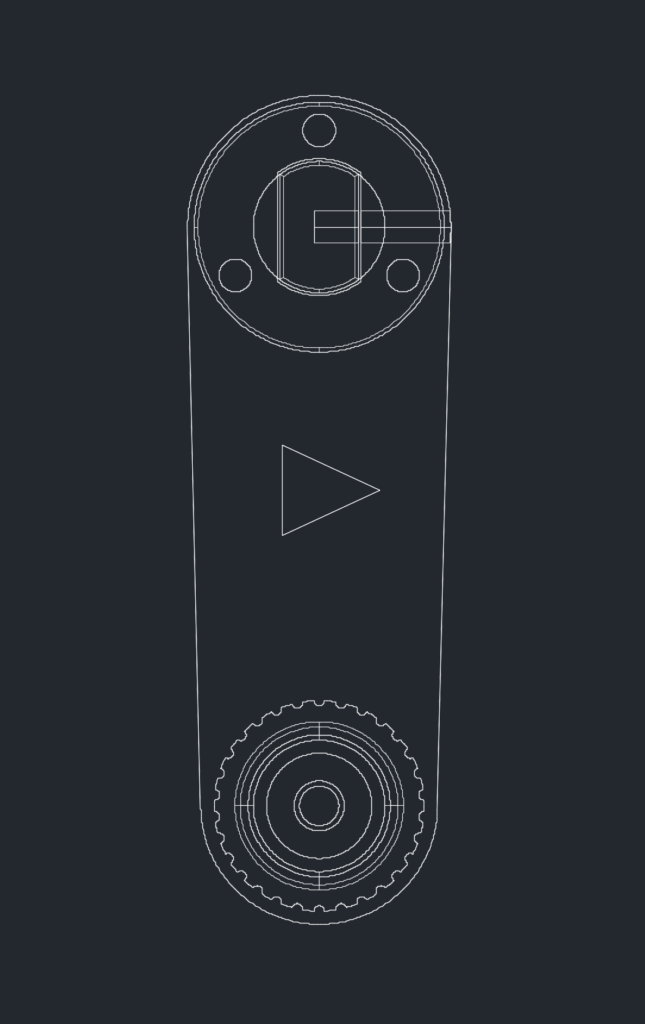
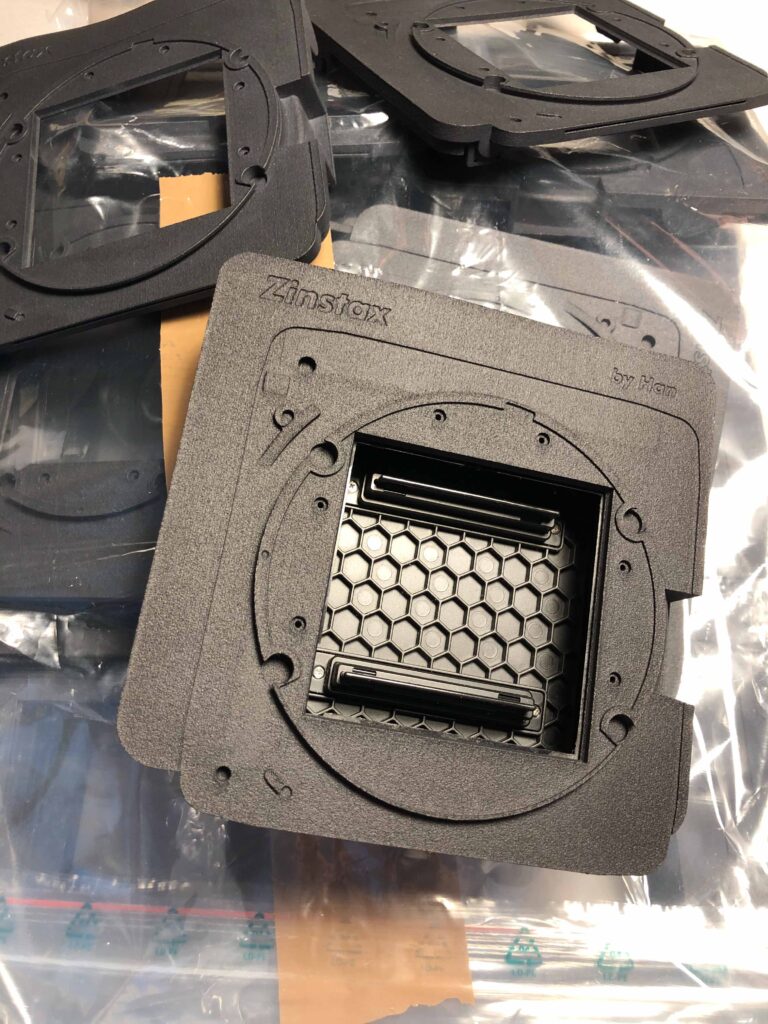
I also added some features in the next iteration which activate both horizontal and vertical in-body masks when the back it turned to it’s working position.
The picture size is smaller than the viewfinder, if you’re wondering why. The viewfinder is around 7×7 and the picture size is about 6×6.
Someone told me the viewfinder isn’t actually 7×7, but I think it’s better to have more stuff in your picture than to have something cut off in your carefully composed image.
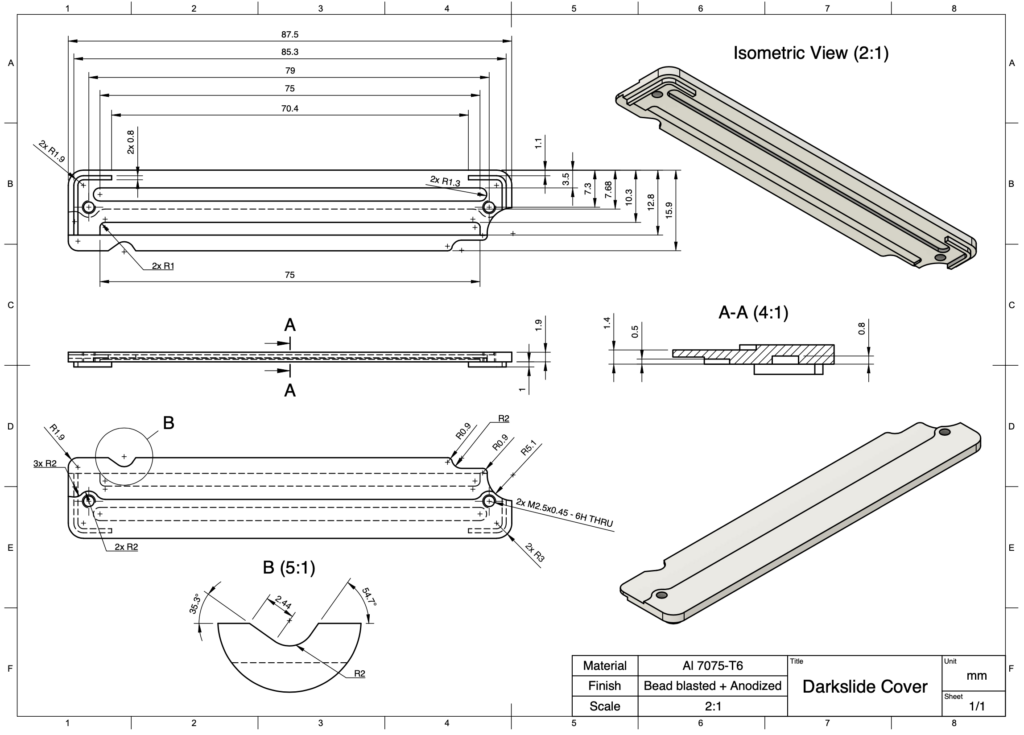
At this point, I thought this is my final design. I thought the light seal was impeccable.
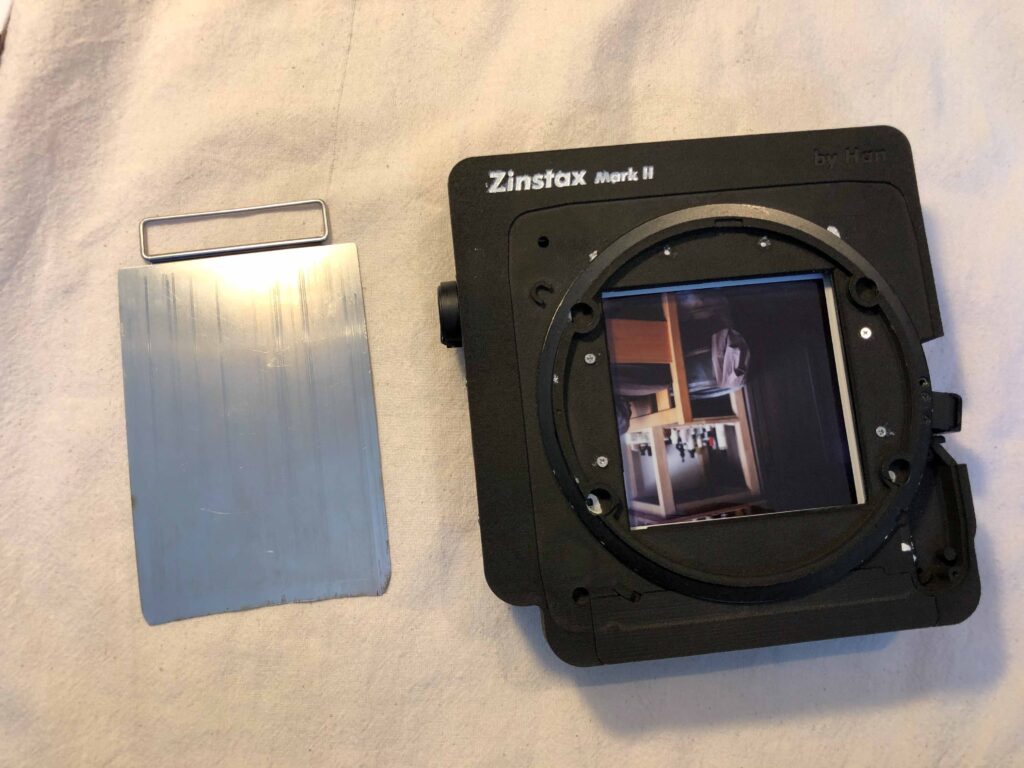
So I went as far as to machine a light seal cover out of aluminium for A LOT OF MONEY. This is a beautifully machined, bead blasted and anodized 7000 series aluminium, a work of art.
Until it dawned on me that there is a better design. This piece became trash.
#truestory
It’s beautiful, but it’s useless, like my pecs.
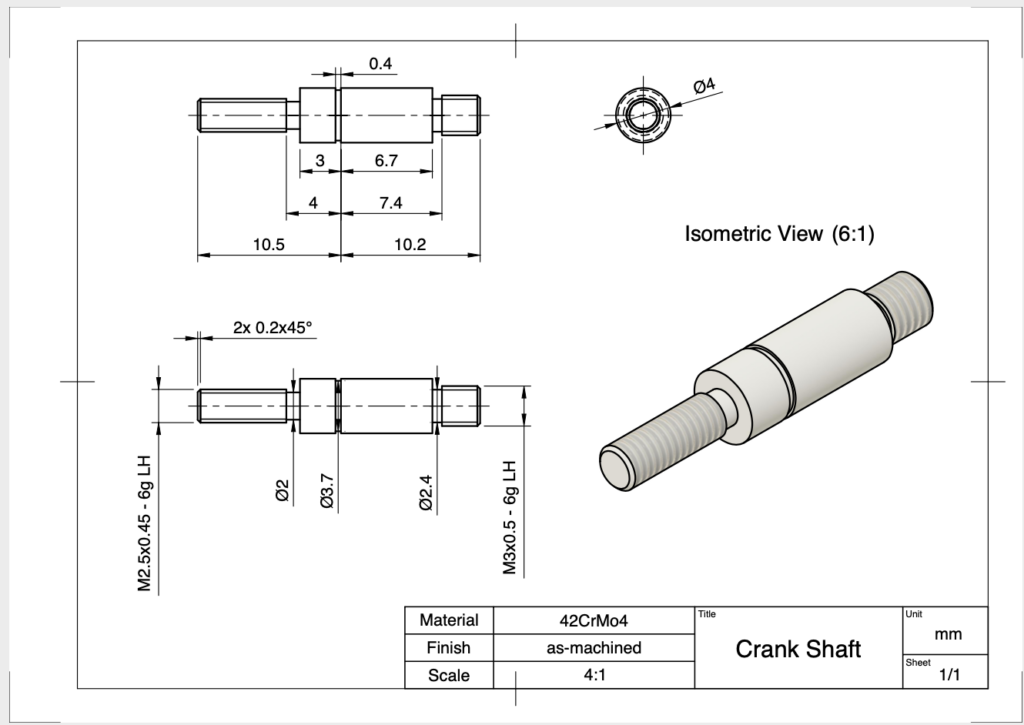
I also wanted to keep the rewind crank of the XA, so I had this beautiful shaft made as well.
I don’t remember how much this costs, probably south of 100€.
This also didn’t get any use at all, because an actual crank feels way better.
I’d say this looks confusing enough for something simple as a crank.
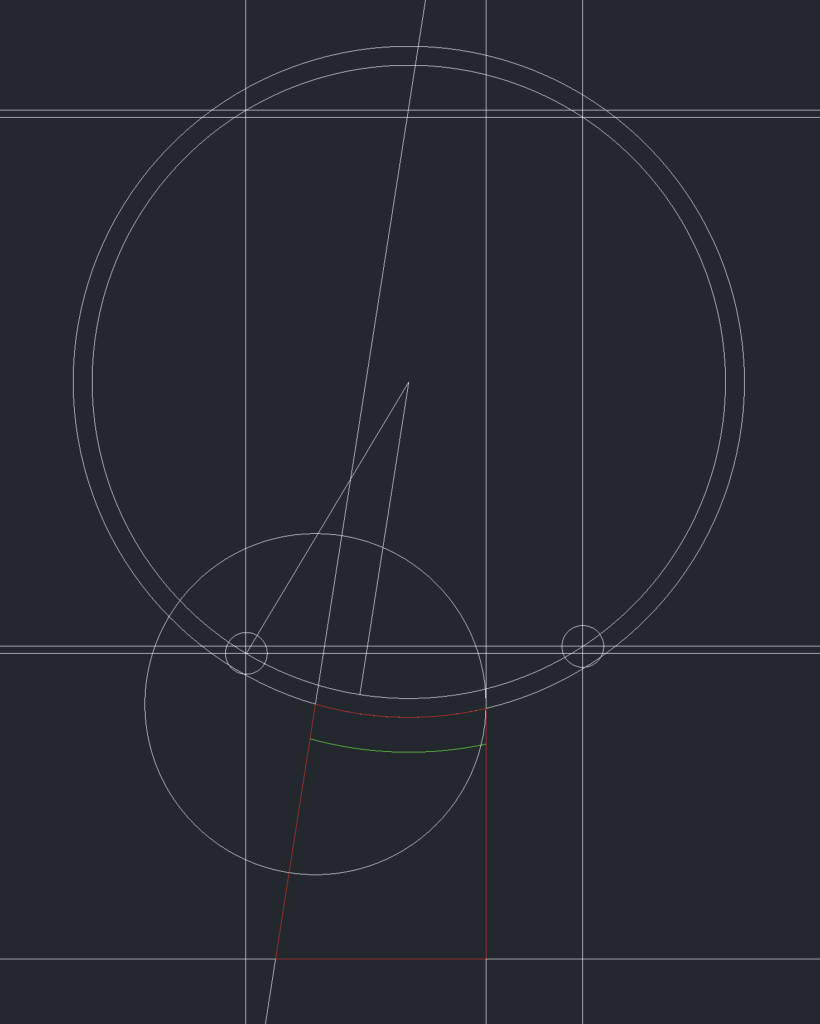
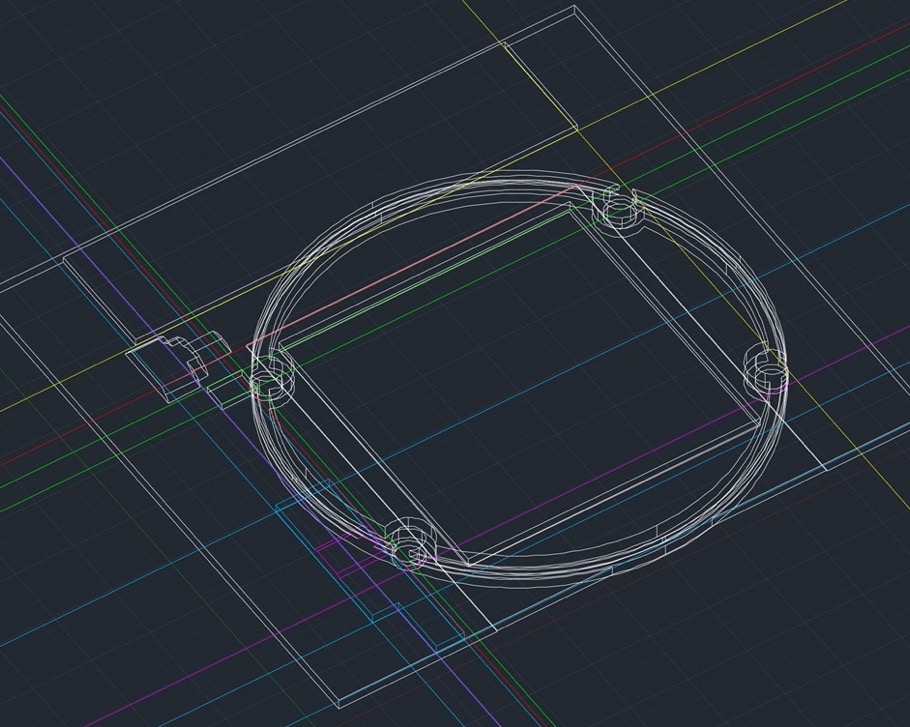
I went on to draw a CAD model of the locking ring. I’ve been using Mamiya’s locking rings up until now.
It surely doesn’t look complicated, I mean it’s basically just a ring.
However, it was difficult enough to measure and calculate where the cut-outs for the locking pin were.
Make one mistake and hundreds of euros go straight down the drain.
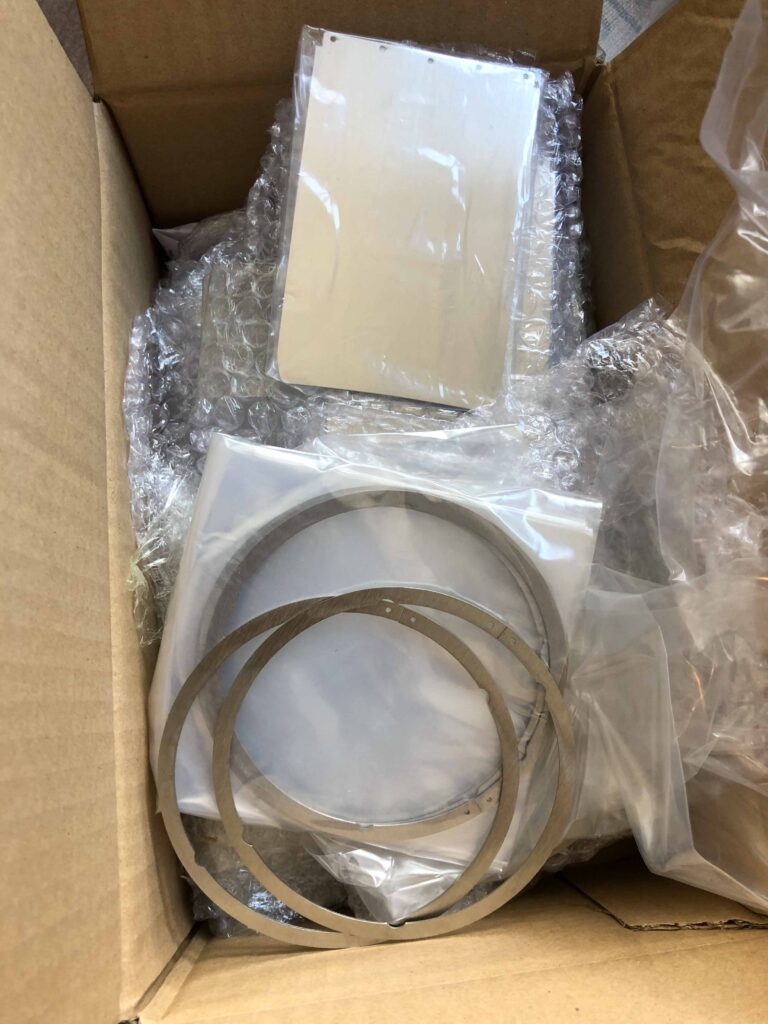
The locking rings and the dark slides are laser cut.
They fit perfectly!
It’s almost perfect, but still took me way too long to make at the time.
I think this is the one Steve got. Let me know, if you’re reading this, Steve!
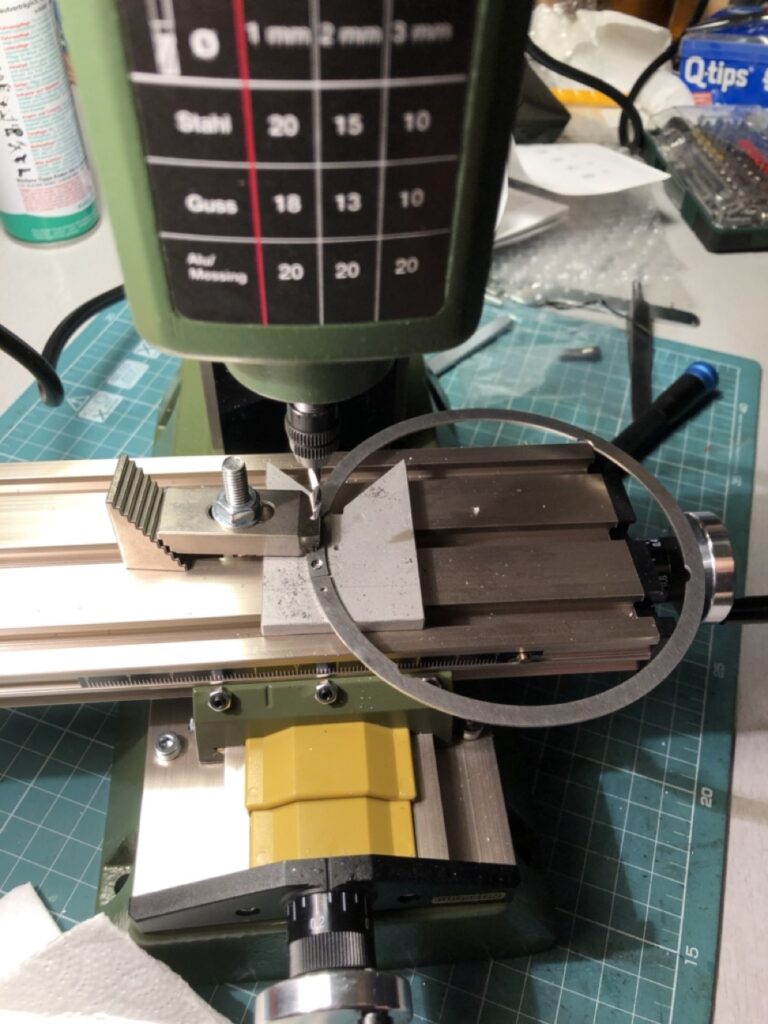
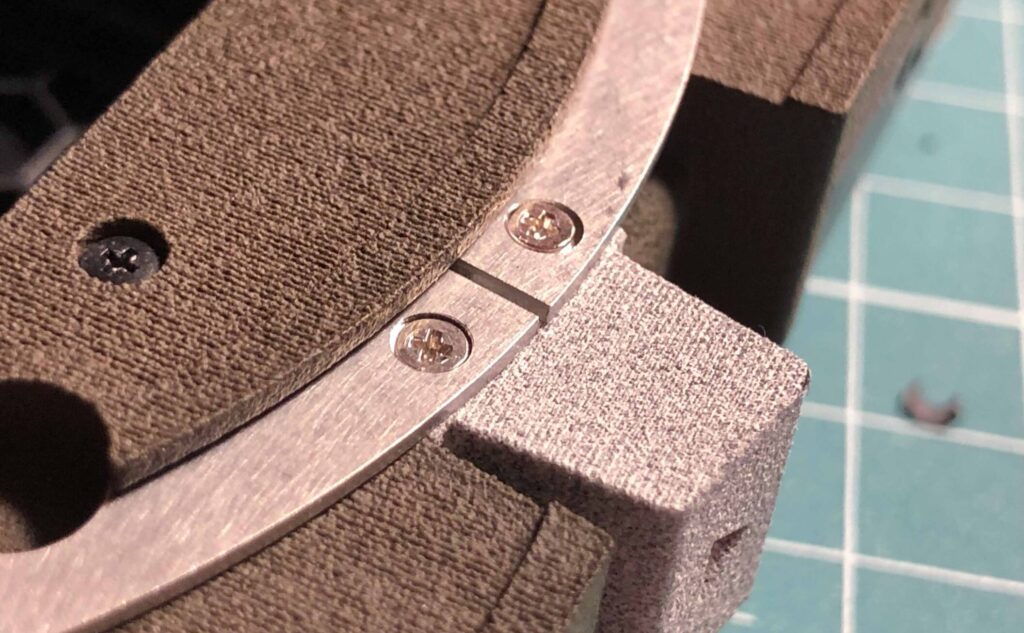
Then I had the idea to countersink the two screws on the locking ring.
I quickly realized I need some kind of a jig to make my life easier.
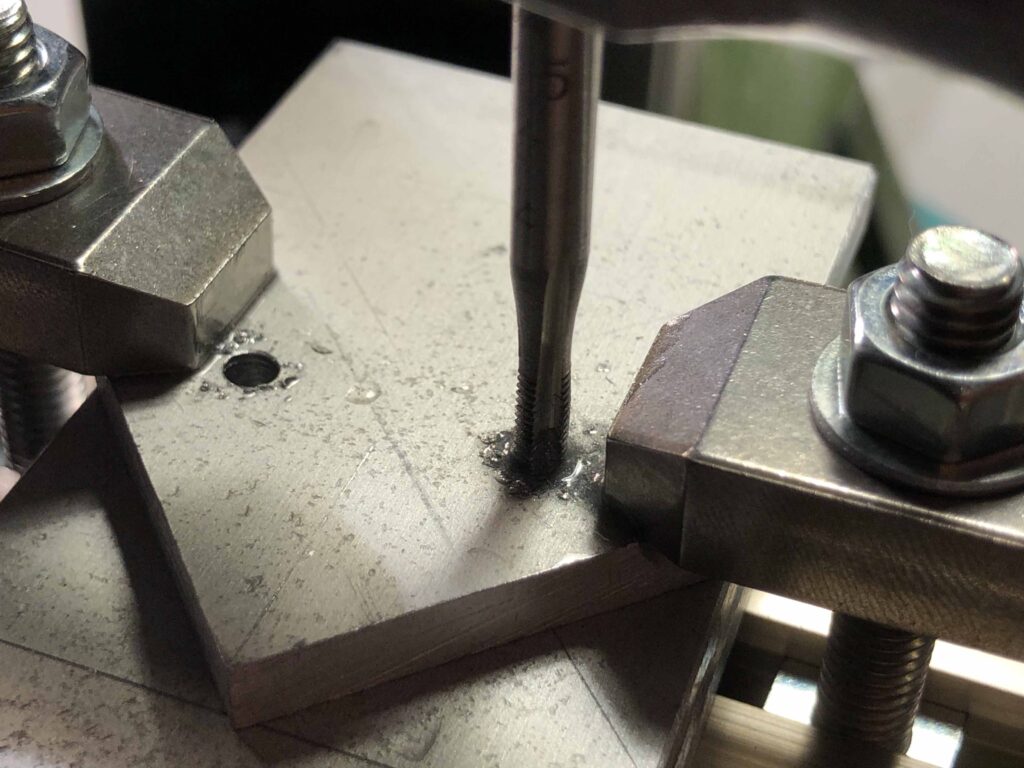
So I made a custom jig for it. It’s a M3x0.5mm metric thread tap in the picture if you think it’s cool and want to have your own M3x0.5mm metric thread tap.
Bought a small Proxxon table top milling machine to do the job. I should’ve bought a drill press instead, but a milling machine comes in handy sometimes.
Definitely broke a few tungsten carbide end mills like every noob just starting out.
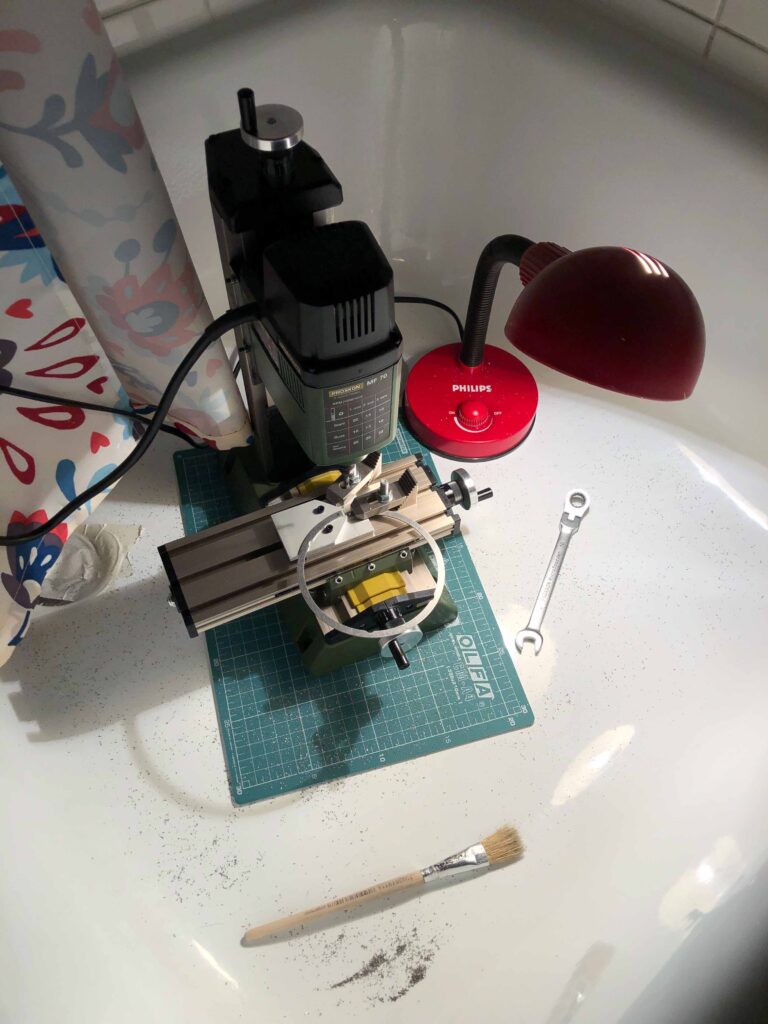
Had to put the machine in my shower tub to contain all the metal shavings.
I wish I had a dedicated studio to make zinstax, but I don’t.
I totally don’t have to do this, but I did.
Only the earliest zinstax don’t have countersunk screws. I apologize and if you own one of these, I’m willing to upgrade it for you for free. Just drop me a message.
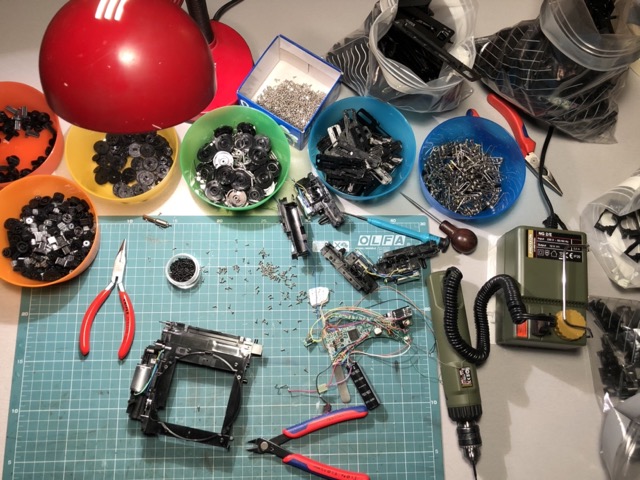
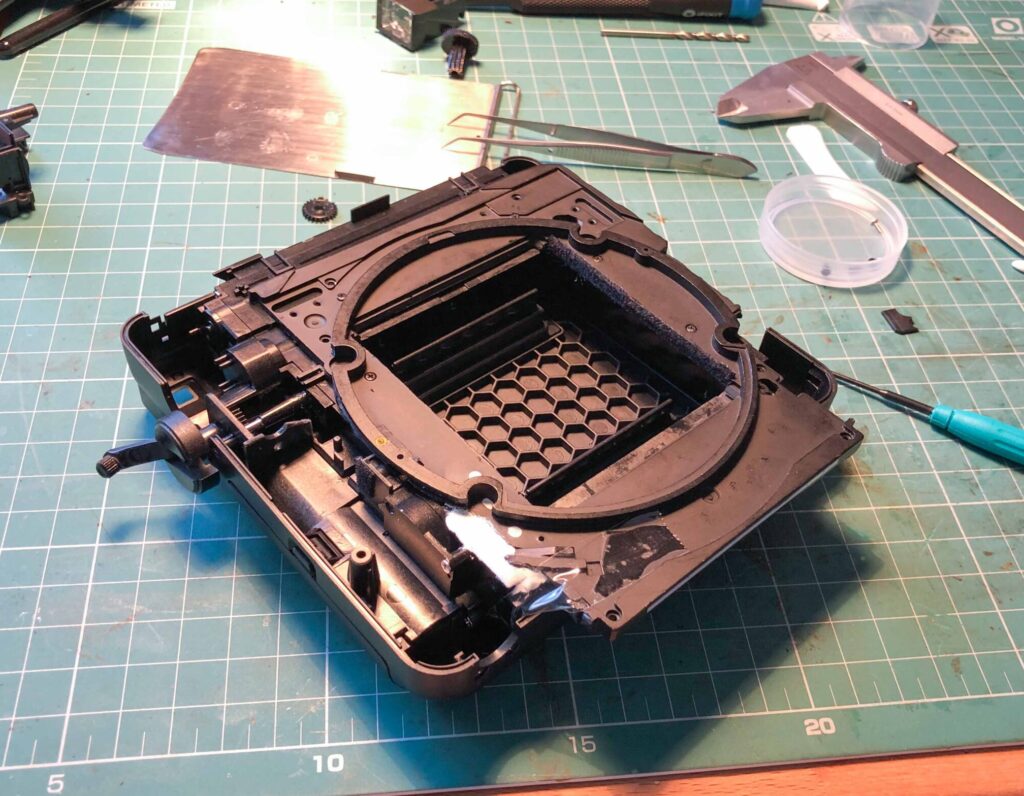
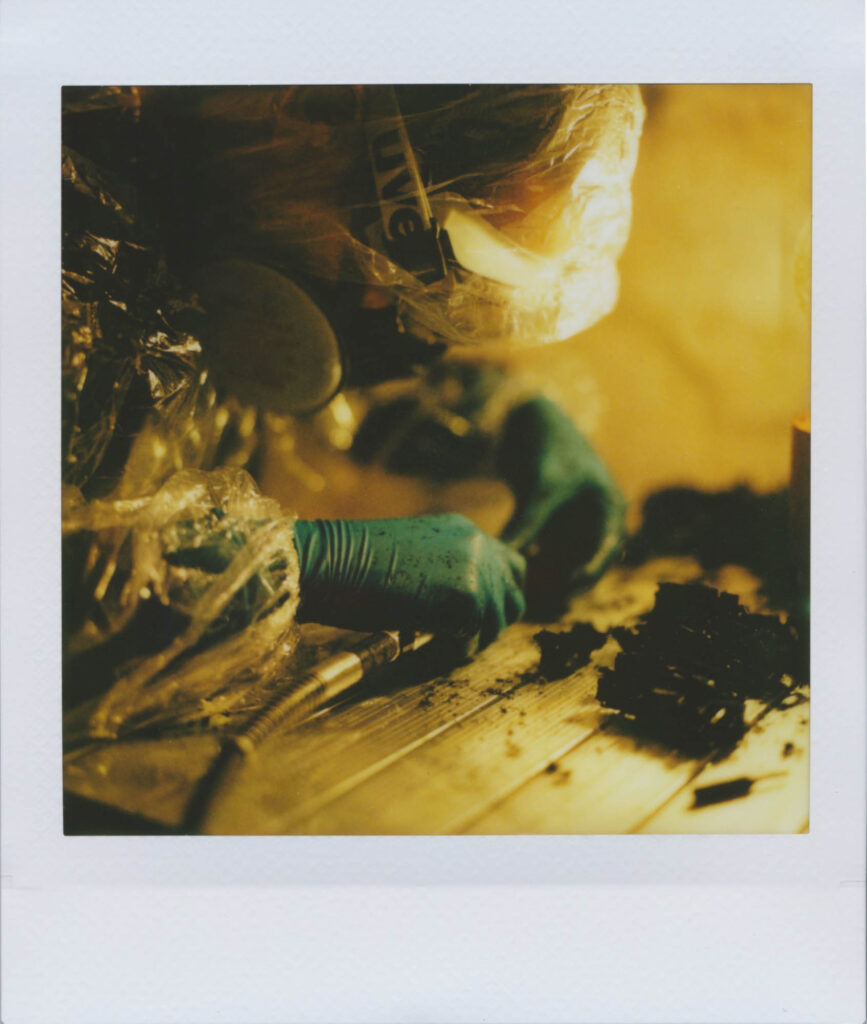
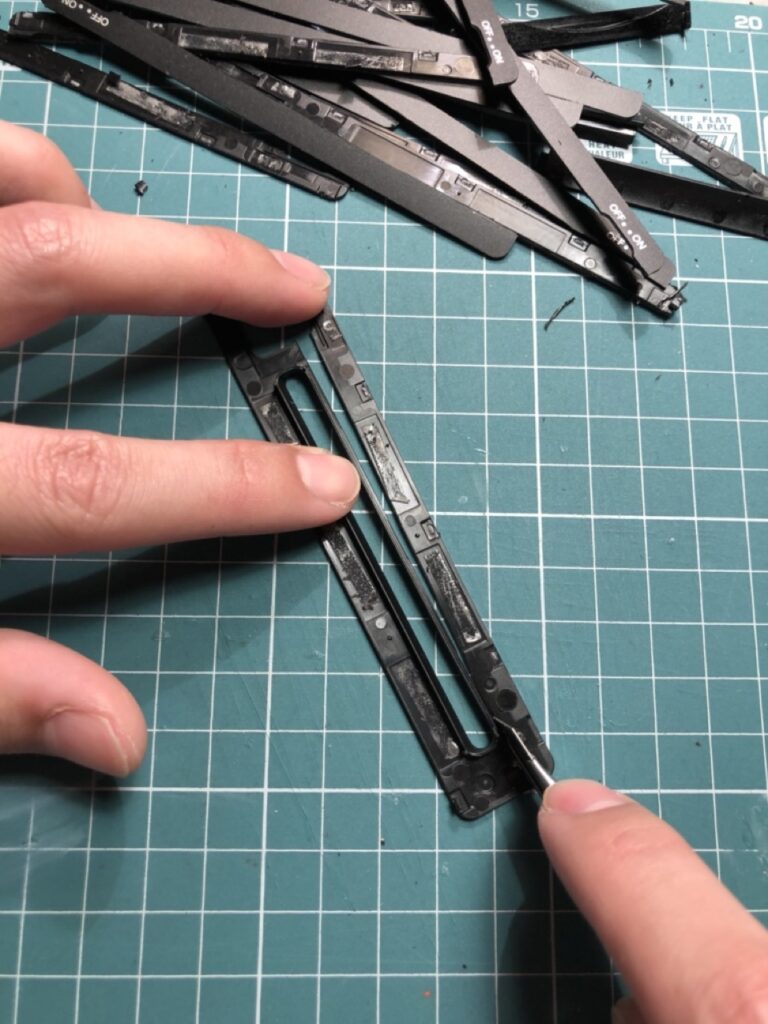
Each SQ6 has to be completely disassembled before moving to the next step.
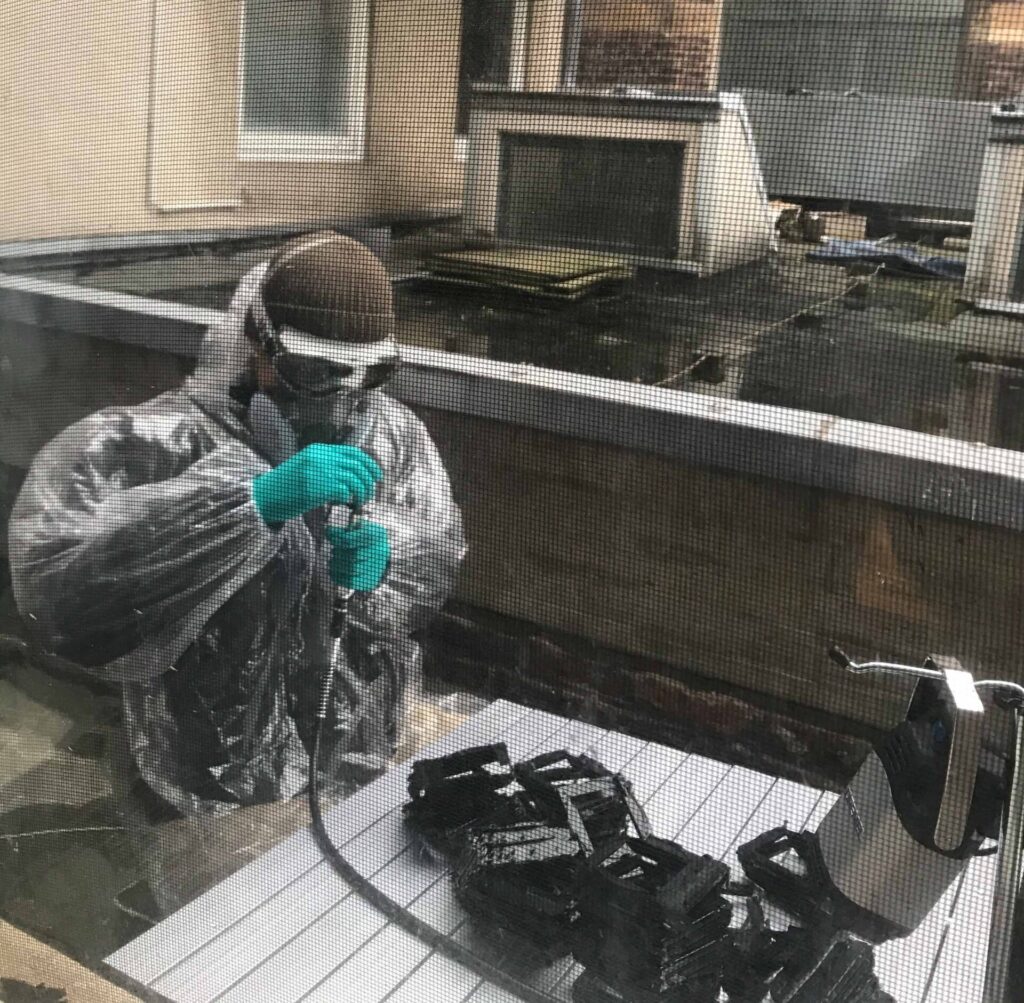
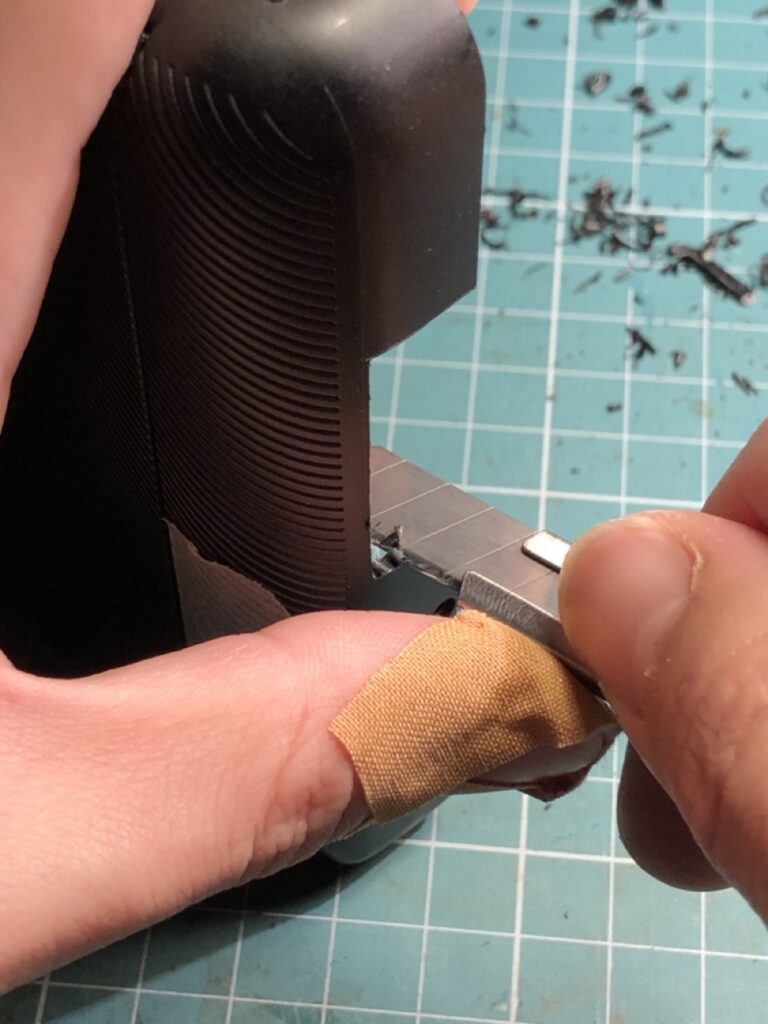
I have to carry the workpieces to a friend’s place for dremeling, because I don’t have a balcony or a basement.
In case you’re wondering why, it’s glass fiber reinforced polycarbonate we are dealing with. I don’t want to fill my sleeping room with floating glass fibers which are really good for your lungs.
The sloped window sill was my working table until I bought this aluminium picnic table. It was windy and drizzling that day. My hands were numb after 1 hour in because it was way too cold, but I had to keep going for another 2 hours.
I moved the whole set-up to his basement since then.
My friend took a picture of me making zinstax with zinstax.
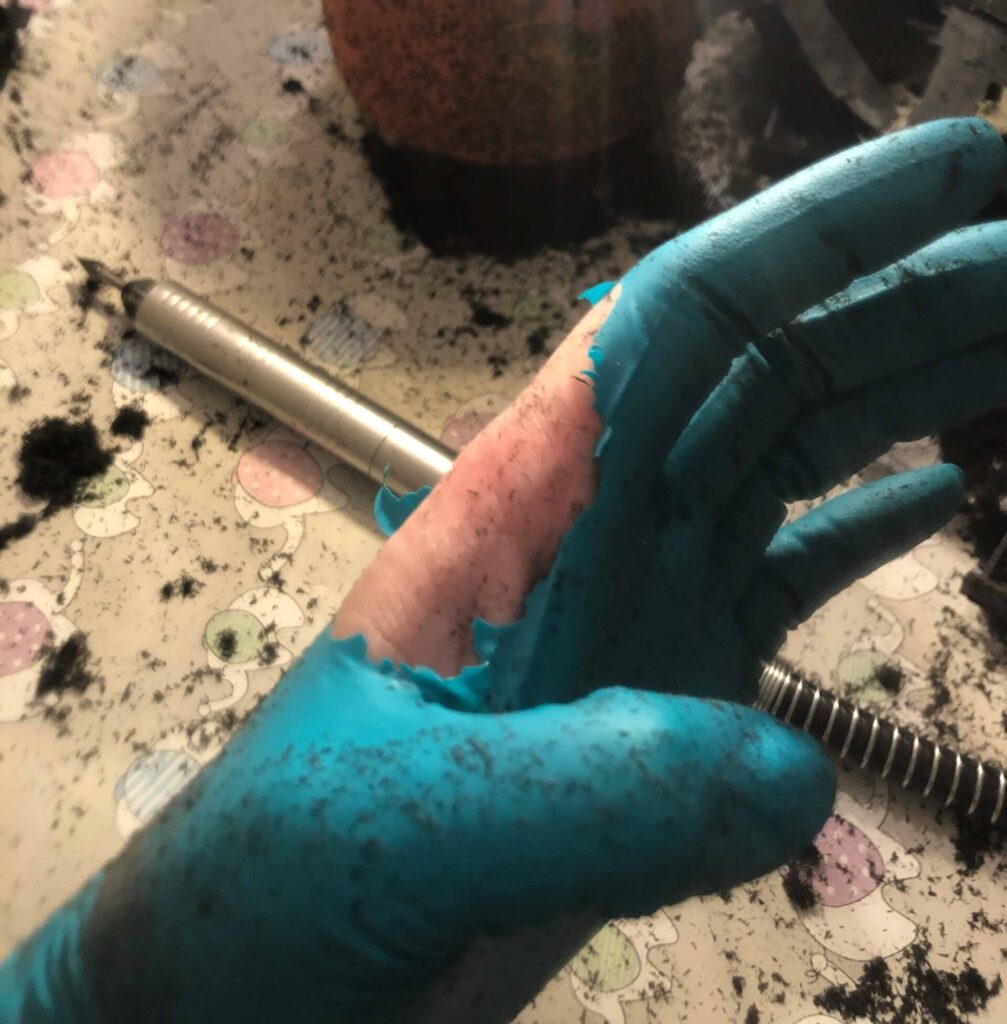
One time the dremel bit touched my hand and the glove was instantly torn into pieces. Dremel bits usually rotate at a speed of 20,000 RPM.
Luckily these gloves were nitrile (which is brittle), the bit could have shredded my hand if these were latex.
This is literally my kitchen table while assembling the zinstax, I know it’s kind of ridiculous. Who would’ve thought?
I came across people on reddit thinking you could make a zinstax with an exacto knife, a pair of pliers and a couple of bucks.
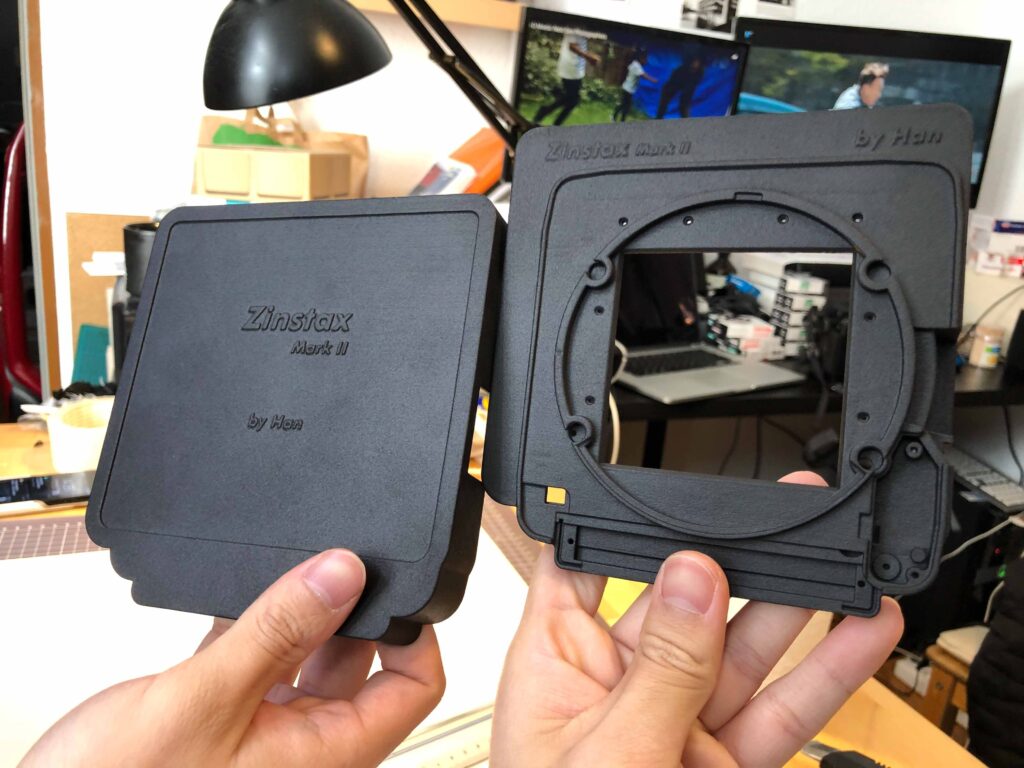
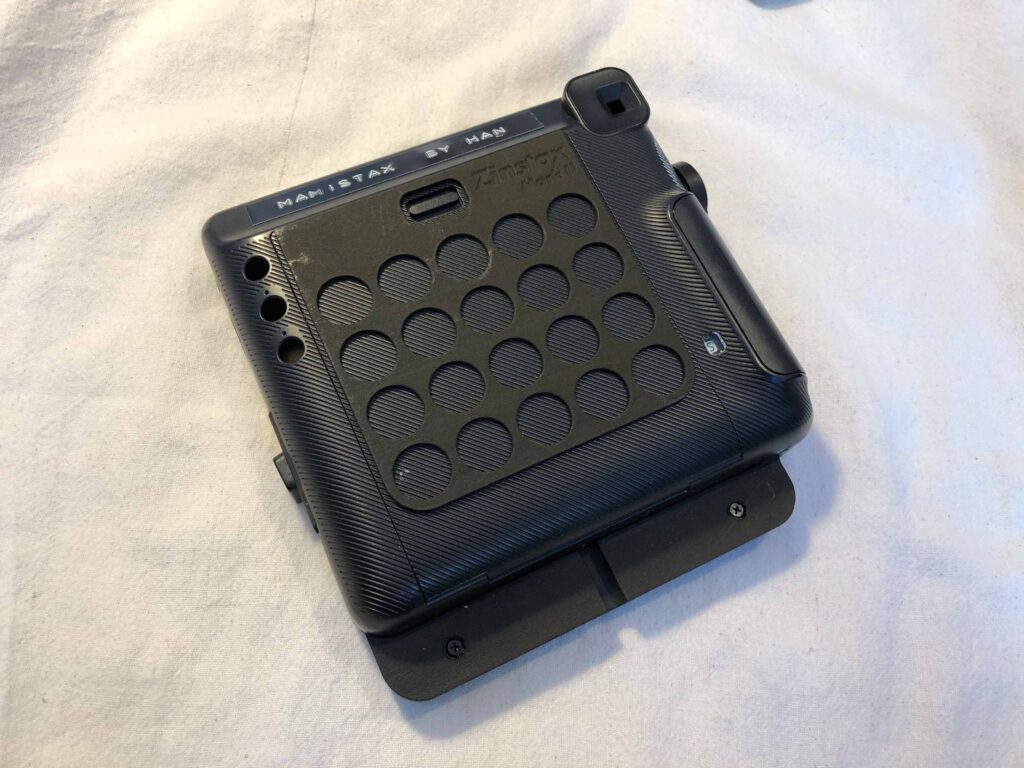
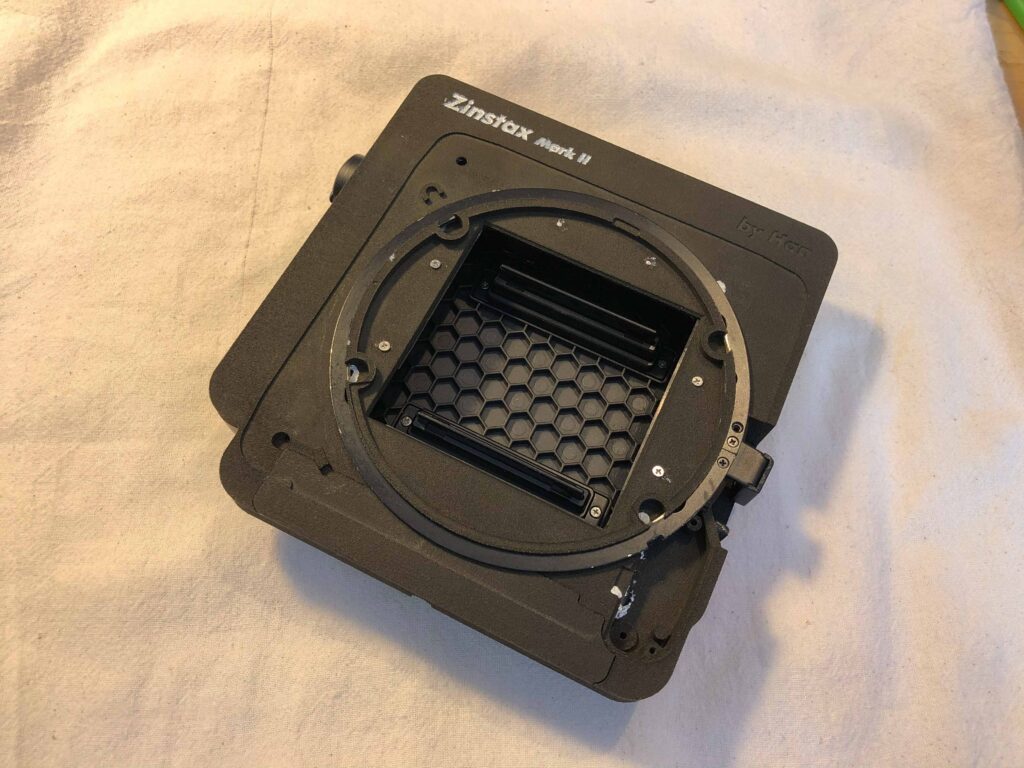
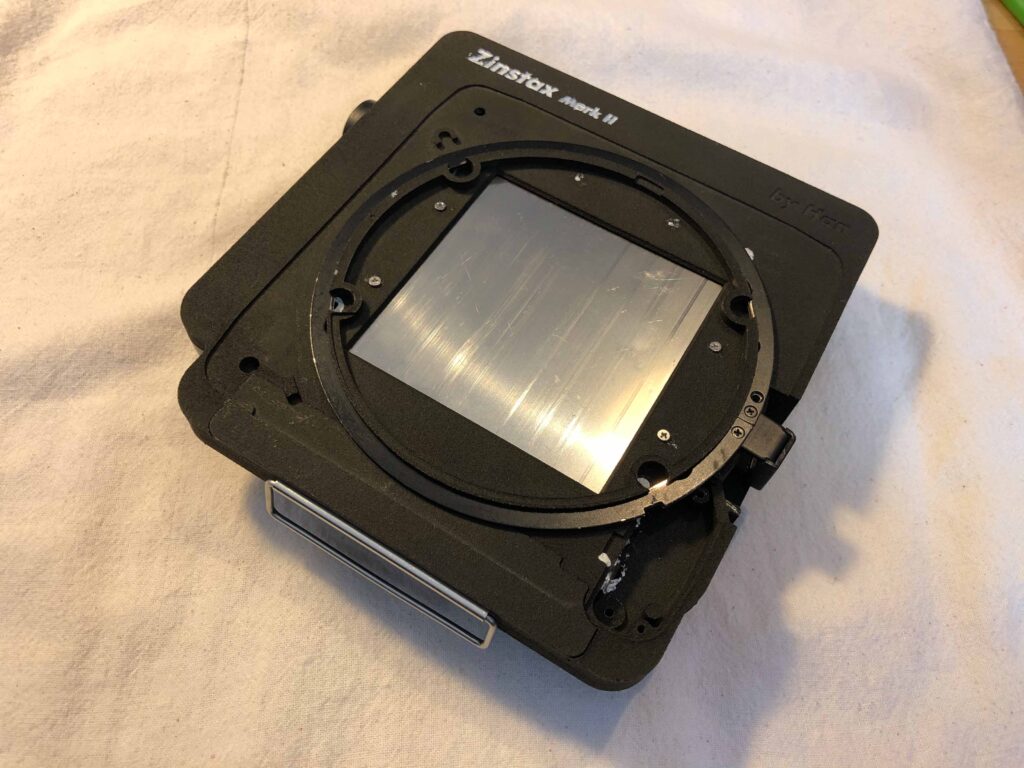
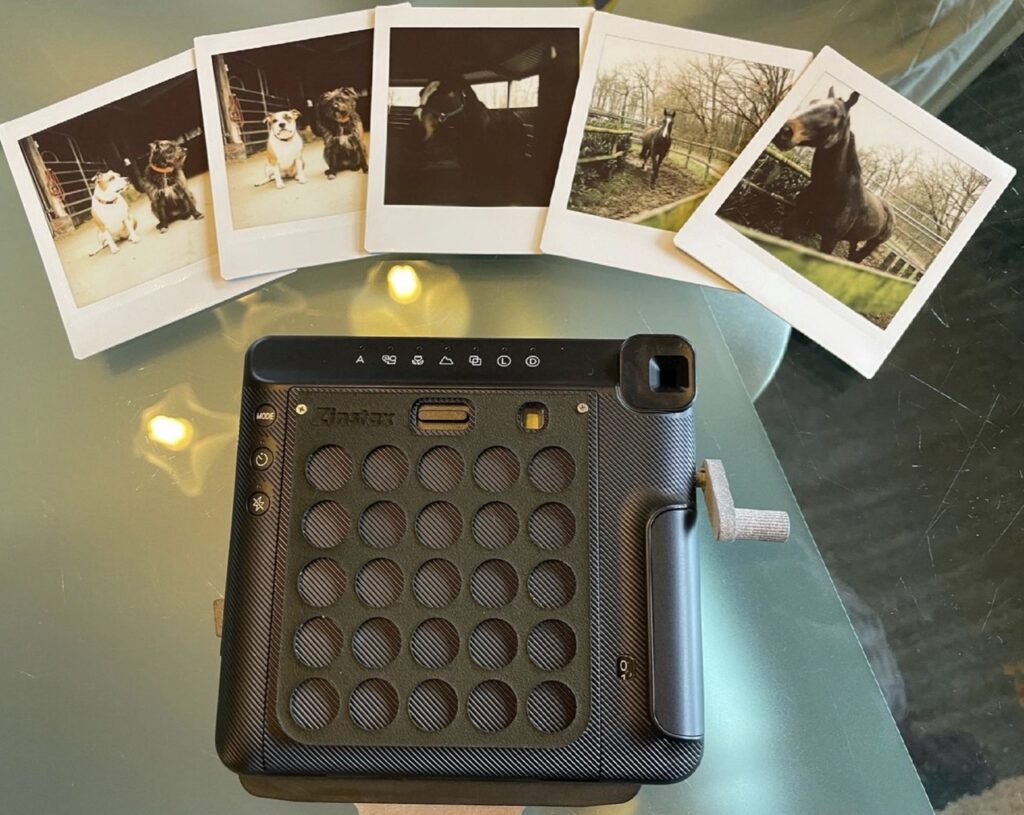
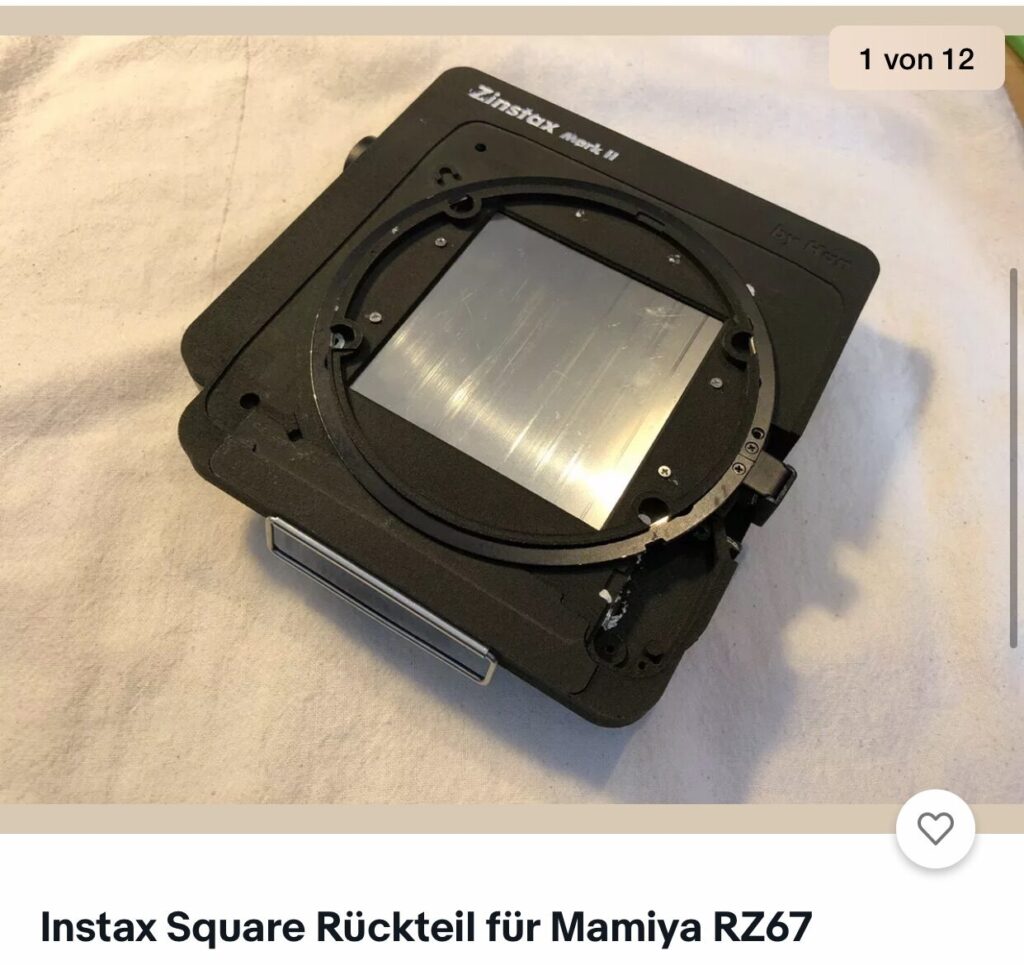
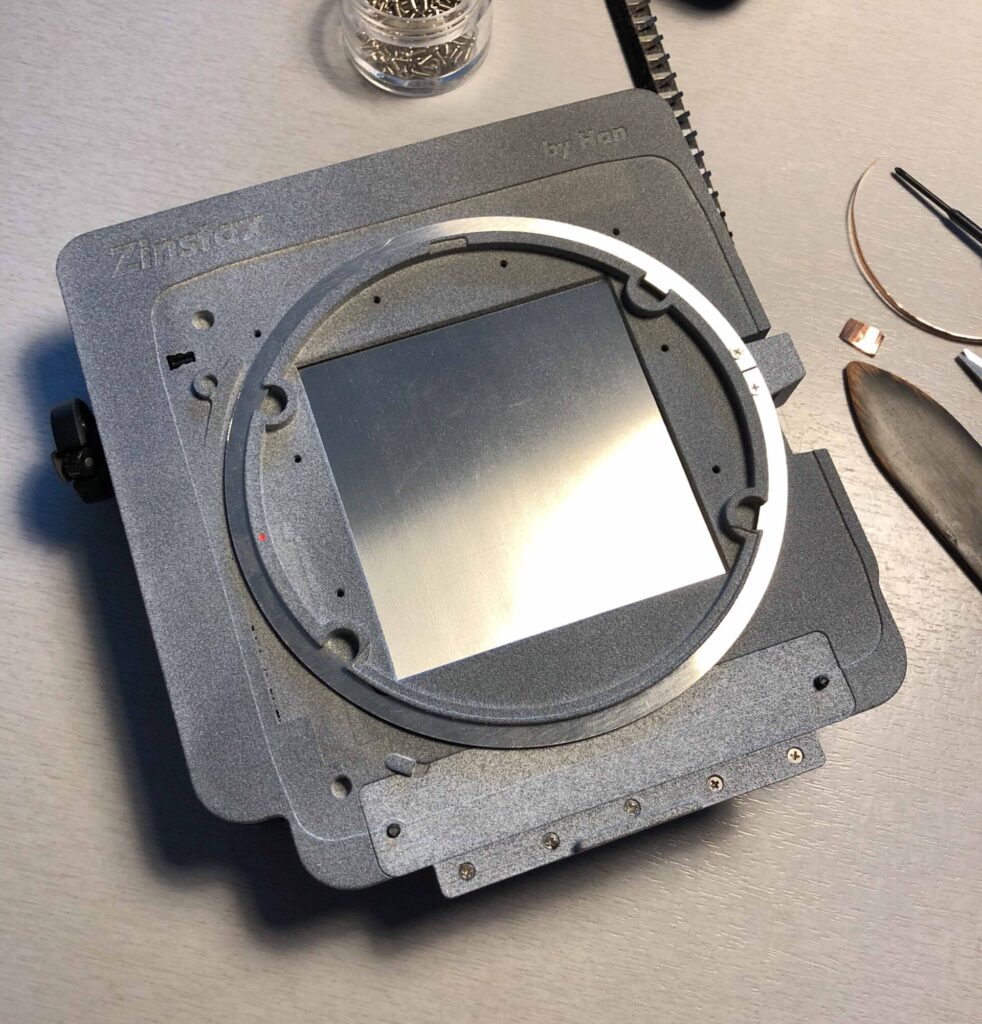
The final design.
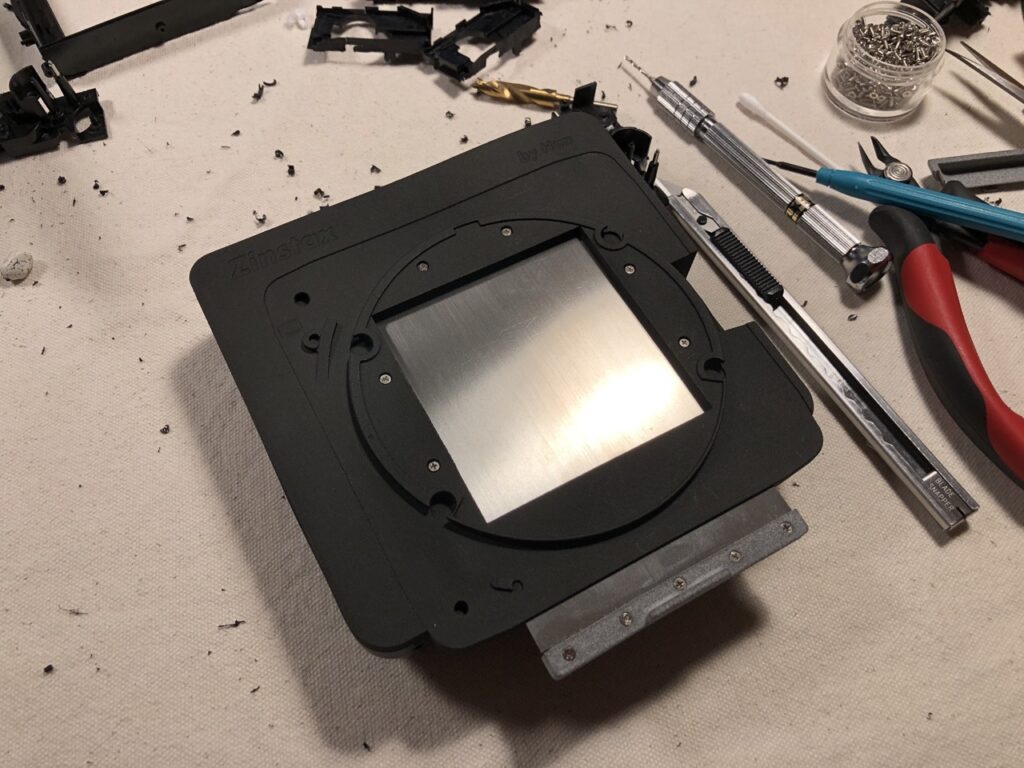
Another one. Notice I haven’t installed the locking ring yet.
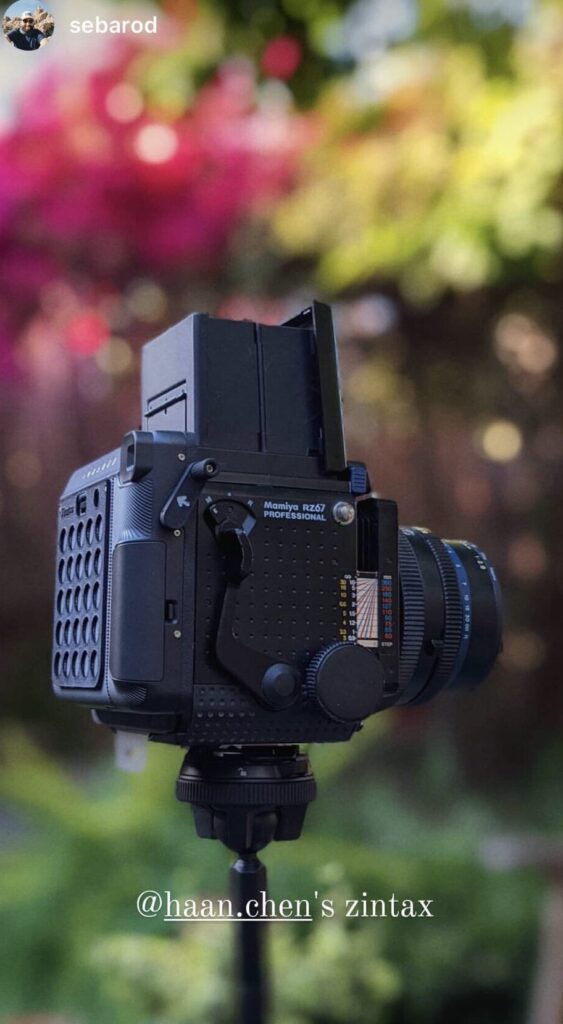
This is the most stunning shot of zinstax itself I’ve received.
Thank you @sebarod.
There were a lot, lot more on my IG. Sadly I don’t have access to them anymore.
I feel so touched T_T
amazing effort!!!Can’t wait for the rb67 zintax back
That’s fantastic and genius, really appreciated your precision.
Can’t wait for Rb67 and Zenza Bronica 😉
Hello haan ,
Love your genius work on the zins tax !
I would like to purchase one for rz6711. How would I go about purchasing
It ?
Thank you
Antonio
Just drop me an email at hello@zins.tax! I’ll set up a page for purchase later when I have enough stock.
I’m stunned !! And i look forward to receiving it. Be sure all my friends will be advised that Zinstax is great and they sould buy it. Happy Holidays Han! Gilles
Hi! Do you make backs for the mamiya 645 super/pro?
I only make backs for the RZ67 at the moment!
Having read this I believed it was rather enlightening. I appreciate you taking the time and energy to put this information together. I once again find myself personally spending a significant amount of time both reading and posting comments. But so what, it was still worth it!
Hey Elizabeth, thank you so much for the kind words, glad to know that it was an interesting read for you!
I have known this product since last year. I hesitated to order, but now I regret it very much. I really want to buy it no matter how long it takes. I’m very supportive of you.
Hey! I’m still making them, so it’s all good. Thanks for getting in touch!
This is awesome work! Amazingly ingenious! Very happy with mine. Many Thanks and congratulations for your effort and engineering!
Thanks Daniel, have fun and keep shooting!
This is unreal and truly a thing of beauty. Buying now.
So why isn´t Zinstax mirrored, like the polaroids from Rezivot? I´m really confused…. And building a Polaroid back at the moment myself 😀
What a beautiful and inspiring journey, I enjoyed reading that. I’ll save up some money to get one, I hope I can afford to ship it to Australia!
Thank you Diego, I try to keep the price as low as I can so more people get to enjoy it. Shipping to Australia is 20€ flat and I’ve already got a lot of Aussie customers too!
Hello
Iam Guru from India, have been looking for a way of using my RB67. Your Instax back story is amazing. Will it be possible to ship one to India. If so please send me an invoice for a back that fits mamiya RB67.
Thanks and great work
Regards
Guru
I have not checked in here for some time since I thought it was getting boring, but the last few posts are great quality so I guess I will add you back to my everyday bloglist. You deserve it my friend 🙂
No way, thank you for checking back! Things got busy so I haven’t posted too often, but the last few updates should be pretty interesting! I realized this site is slowly turning into my personal blog and I’m not sure if it’s a good thing. Hopefully people won’t get bored reading my ramblings.
You have remarked very interesting details! ps nice web site.
Sehr innovativ! Gerne möchte ich es für meine Hasselblad kaufen.
Beste Grüße Dr.H.Klein